Chatbox settings
Chatbox is popup on your website includes sections to track order, contact and question list. This is how a chatbox looks like on your website.
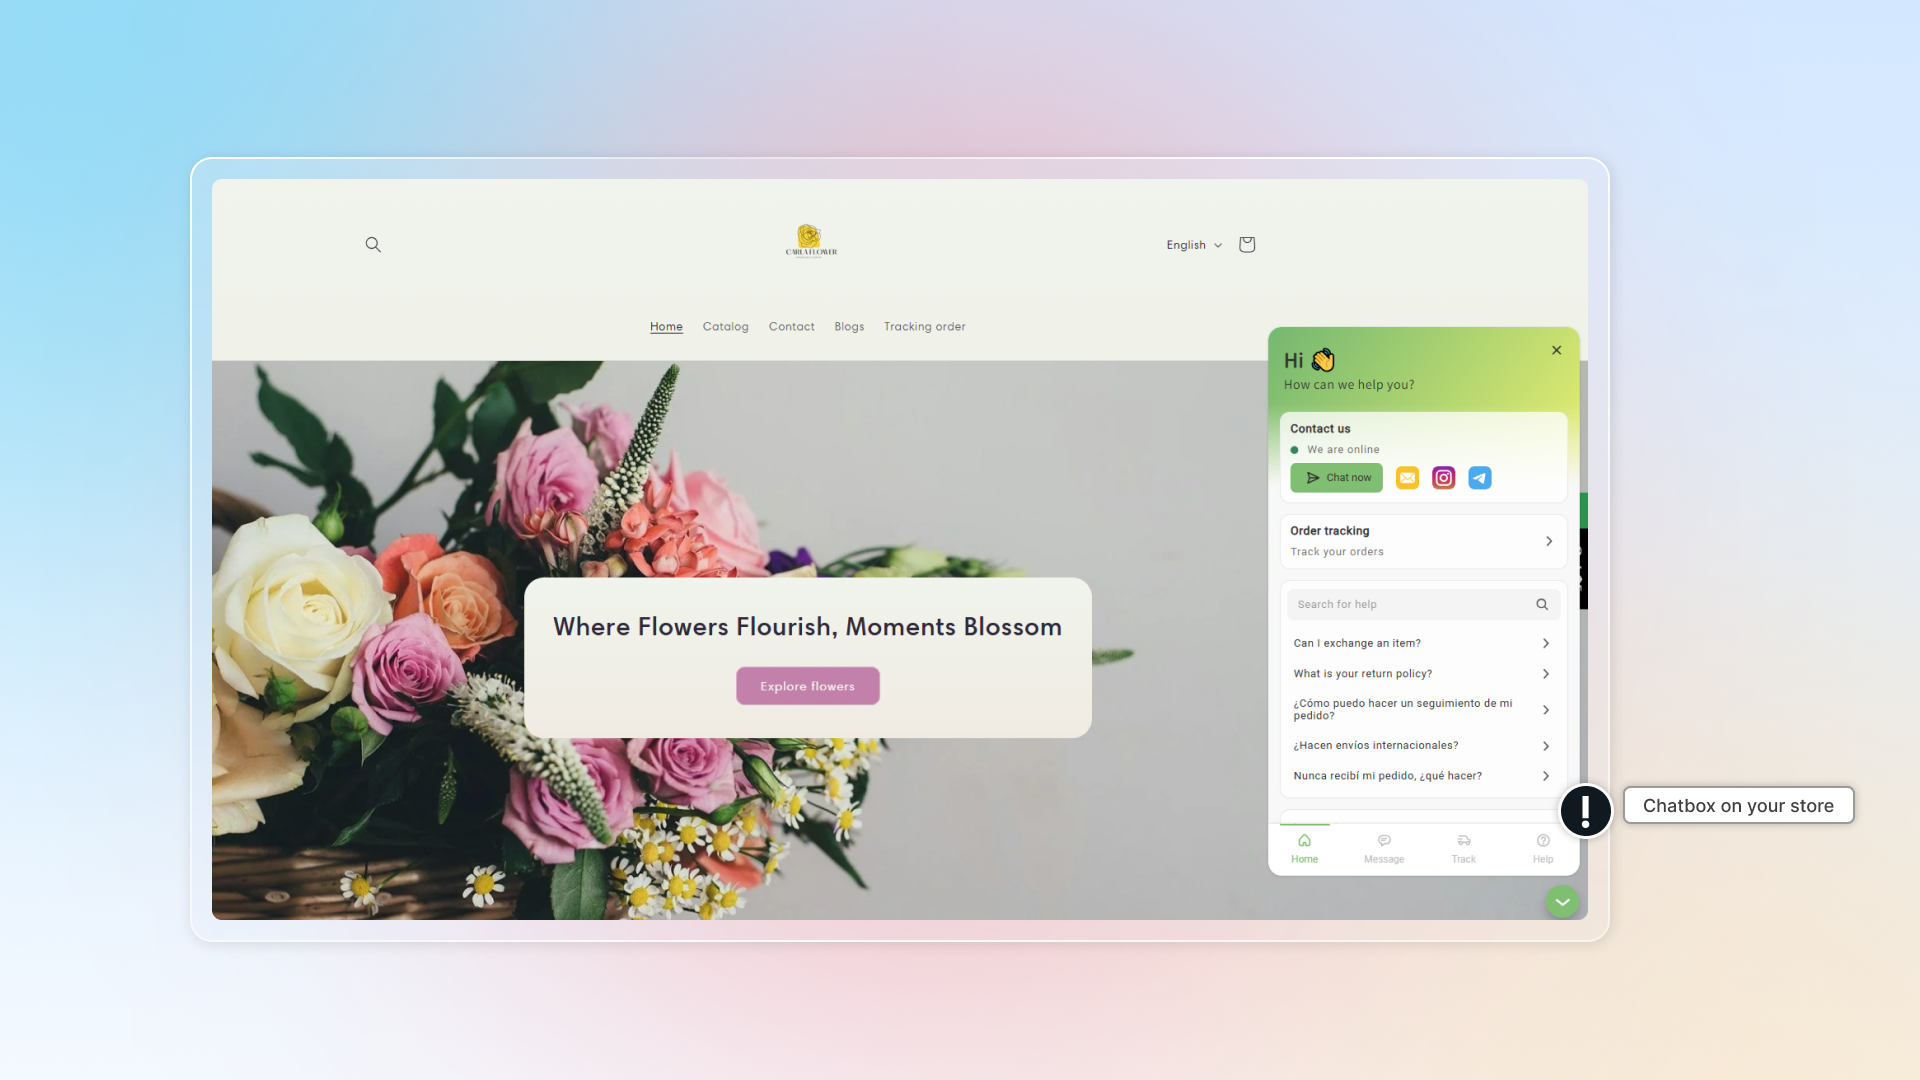
Customize chatbox
On the Chatbox page, the Display chatbox on your store switch turns the chatbox on or off. Open Legacy chatbox to reach the General and Appearance tabs.
In general settings, you can:
- Turn on chat focus mode
- Set header
- Set blocks
In appearance settings, you can:
- Customize brand color
- Set chatbox button
- Set chatbox style
- Remove watermark
In the Shared chatbox settings card on the Chatbox page, you can:
- Set the pre-chat form
- Set deep links
- Add an embedded chatbox
- Set display devices & pages
- Add custom CSS
- Turn on Continue as email
- Choose the chat avatar
General settings
Turn on chatbox
Use the Display chatbox on your store switch at the top of the Chatbox page. It saves as soon as you flip it.
Enable Chatty in theme editor
Set header
- Upload logo
- Customize your heading and description
Turn on blocks you want to show in chatbox
There are 5 blocks in chatbox:
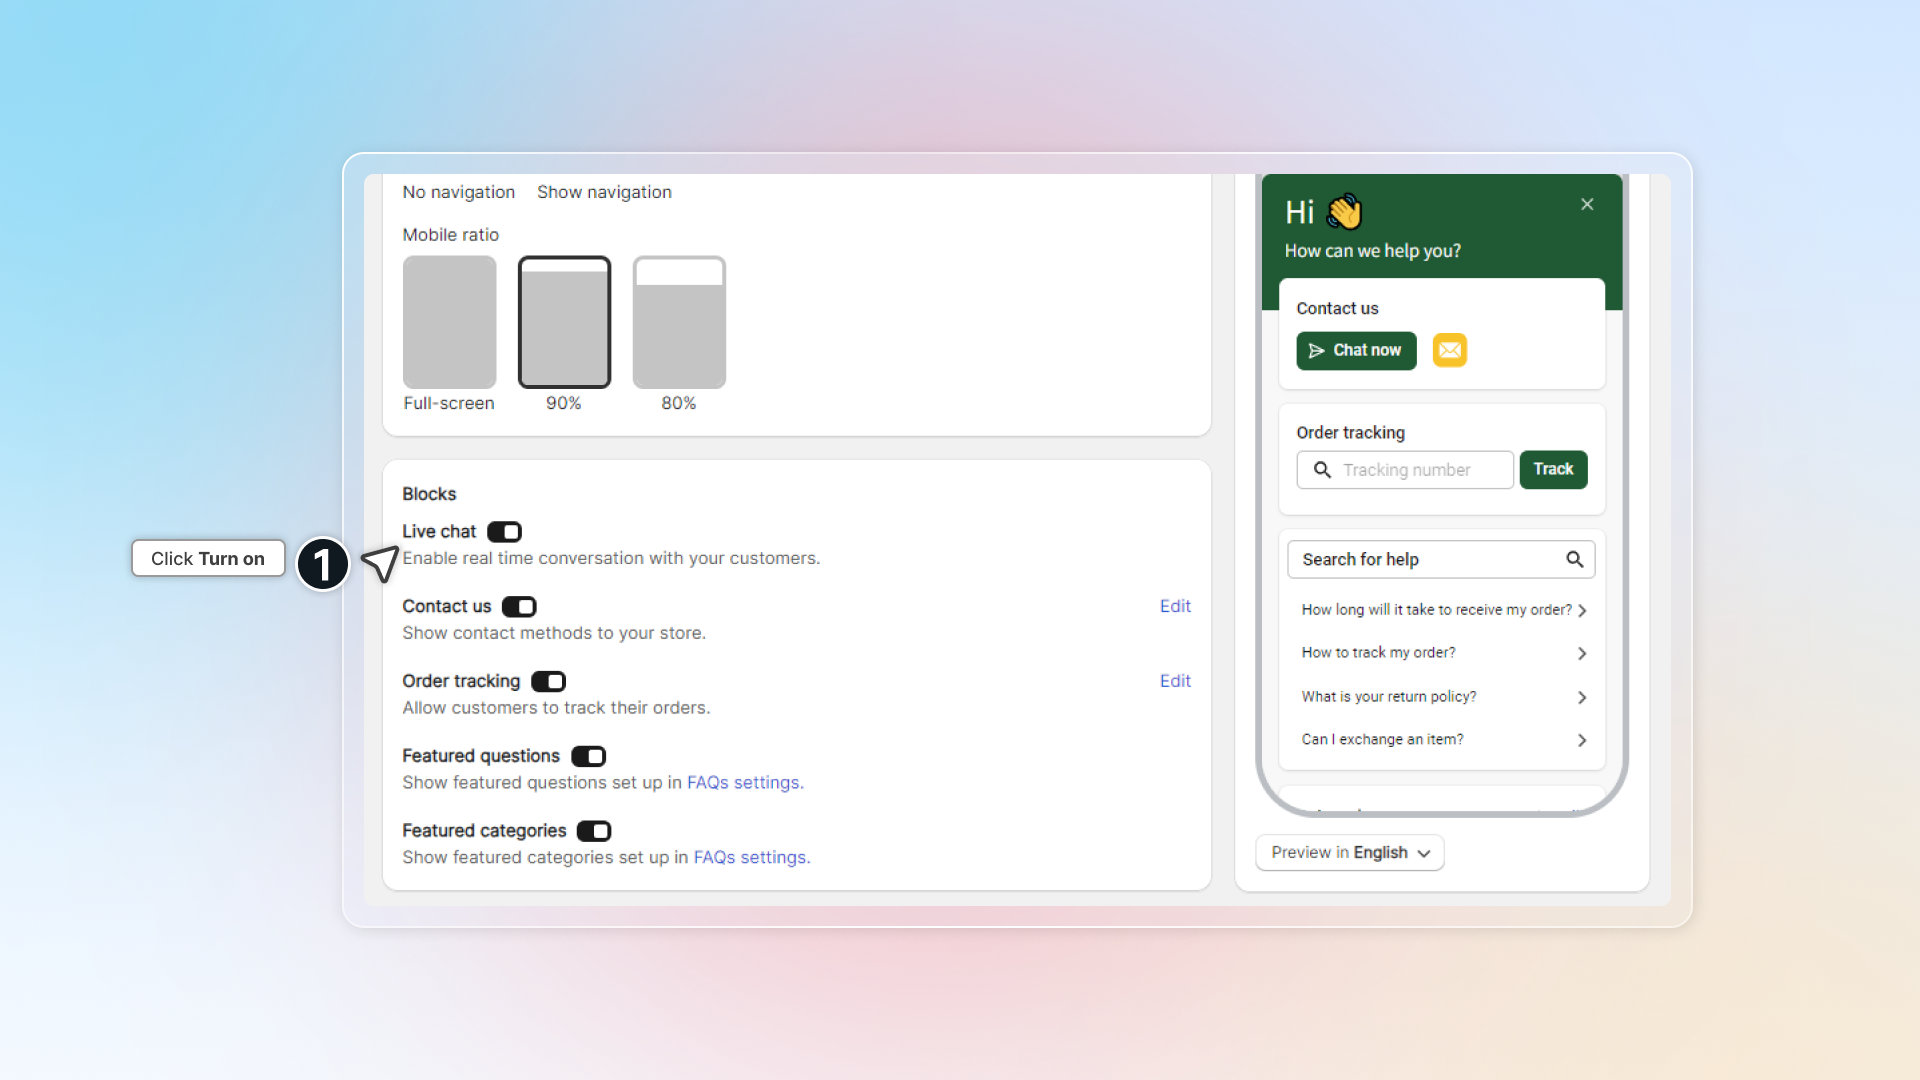
- Live chat: Turns on the Message tab so customers can chat with your AI agent and your team. Turn it off and the chatbox becomes self-serve only.
- Contact: This helps you to set up all contact methods for your store. Turn it on and click Edit to add your contact methods.
- Order tracking: Helps track orders (third party allowed). Learn more about order tracking.
- FAQs: Pick some questions to show on first page of chatbox
- Categories: Pick some categories to show on first page of chatbox
Set up live chat
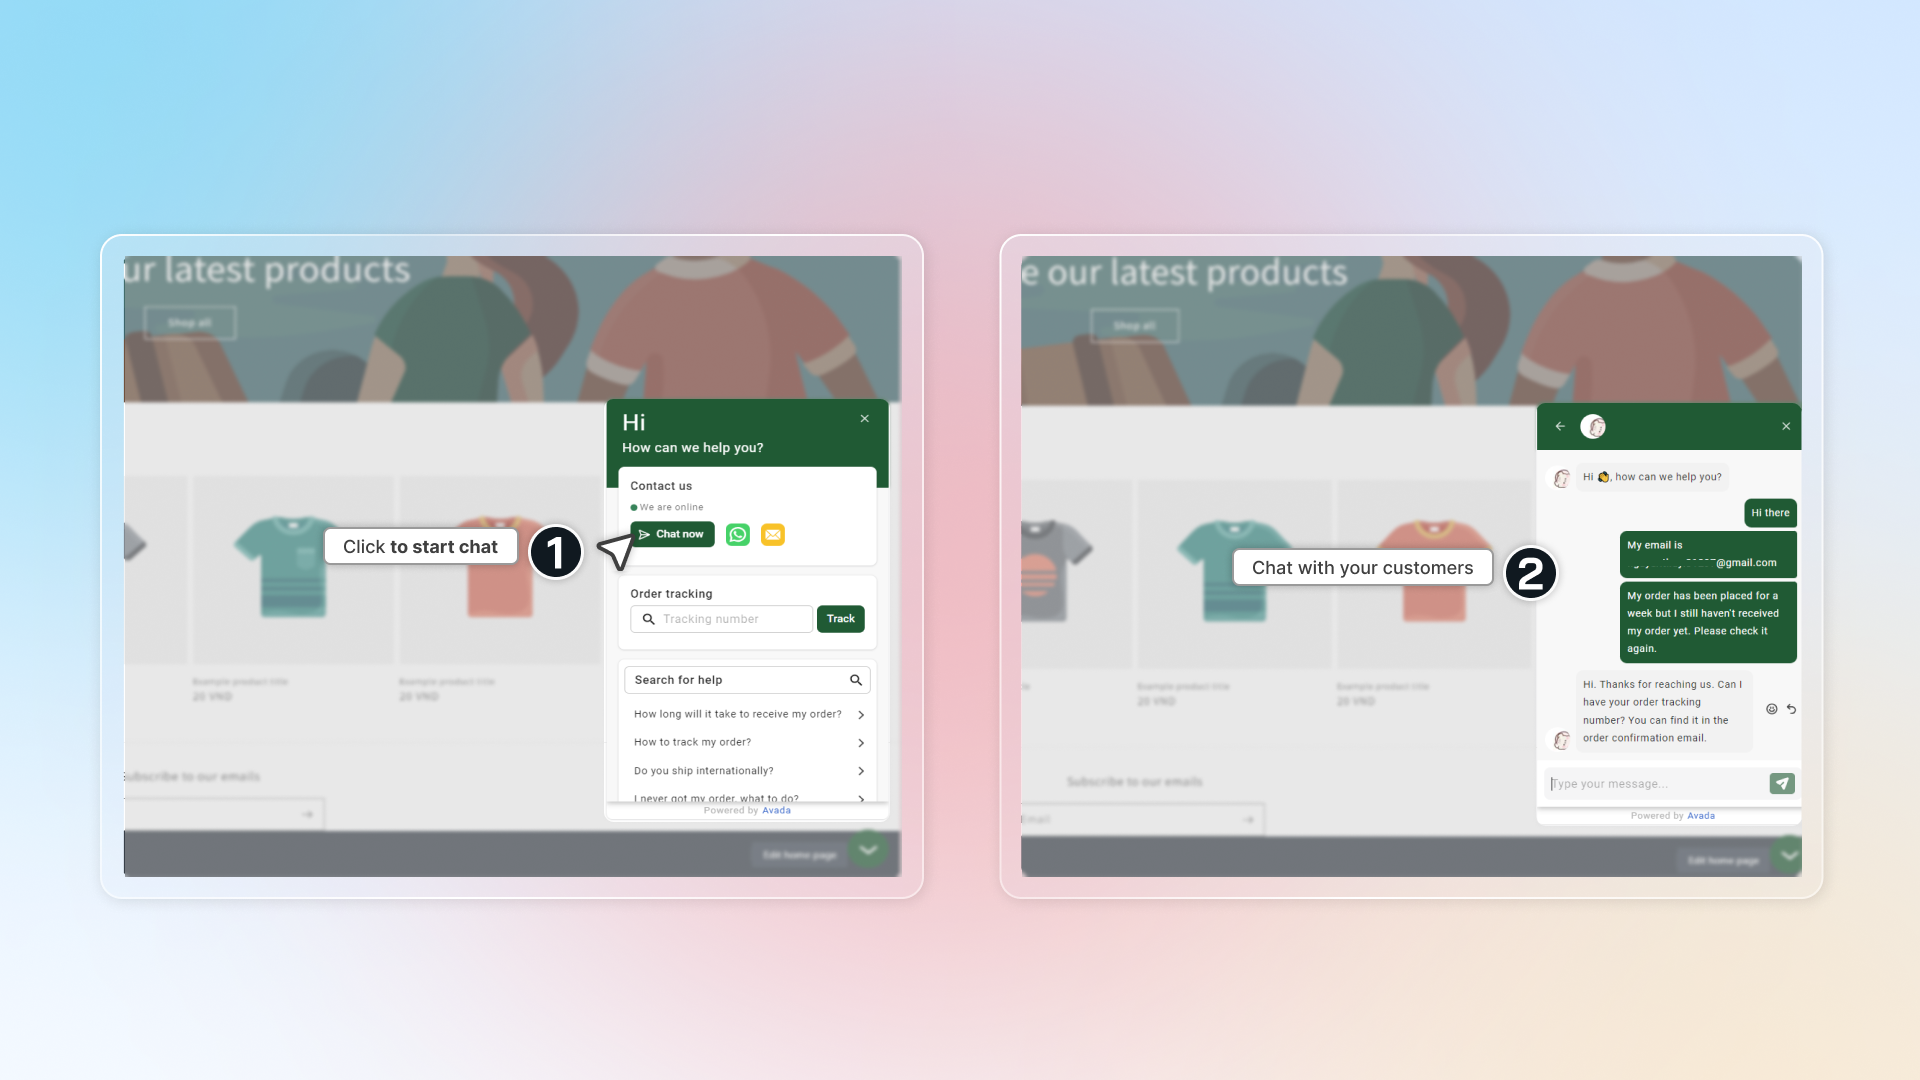
Live chat lets customers reach you while they are browsing your store, so you can answer right away and manage the chats from one inbox.
-
On the Chatbox page, turn on Display chatbox on your store. Then open Legacy chatbox → General.
-
In Blocks, turn on Live chat.
-
Set up the pre-chat form and choose how customers start a chat in Chatbox → Shared chatbox settings → Pre-chat form.
-
Click Save, then open your storefront and click Chat now to start a test conversation.
To preview the pre-chat form, click Chat now in the preview and enter your first message. You can also set your online and offline status in online hours.
Add contact button
Learn how to add contact button to your site.
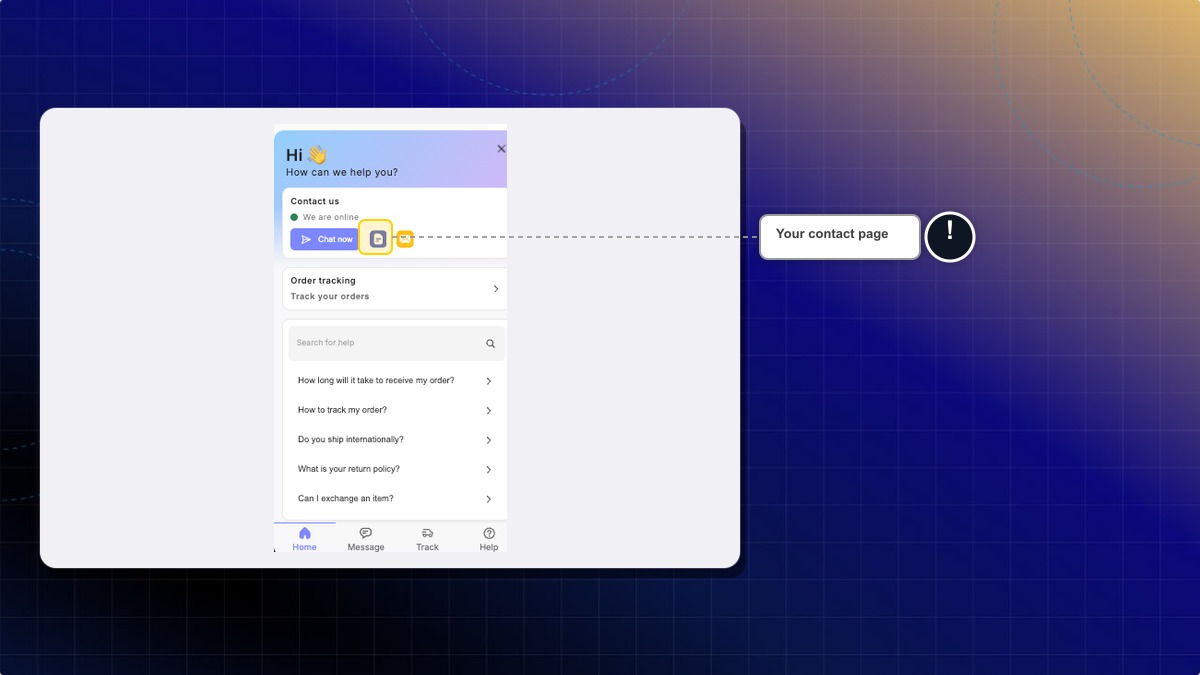
One of the contact methods is Contact page, which opens the contact link you set.
- Go to Chatbox → Legacy chatbox → General. In the Contact block, click Edit.
- Click Add contact method, then pick Contact page.
- Paste the link to your contact page, for example
/pages/contactor a full link that starts withhttps://. - Click Save.
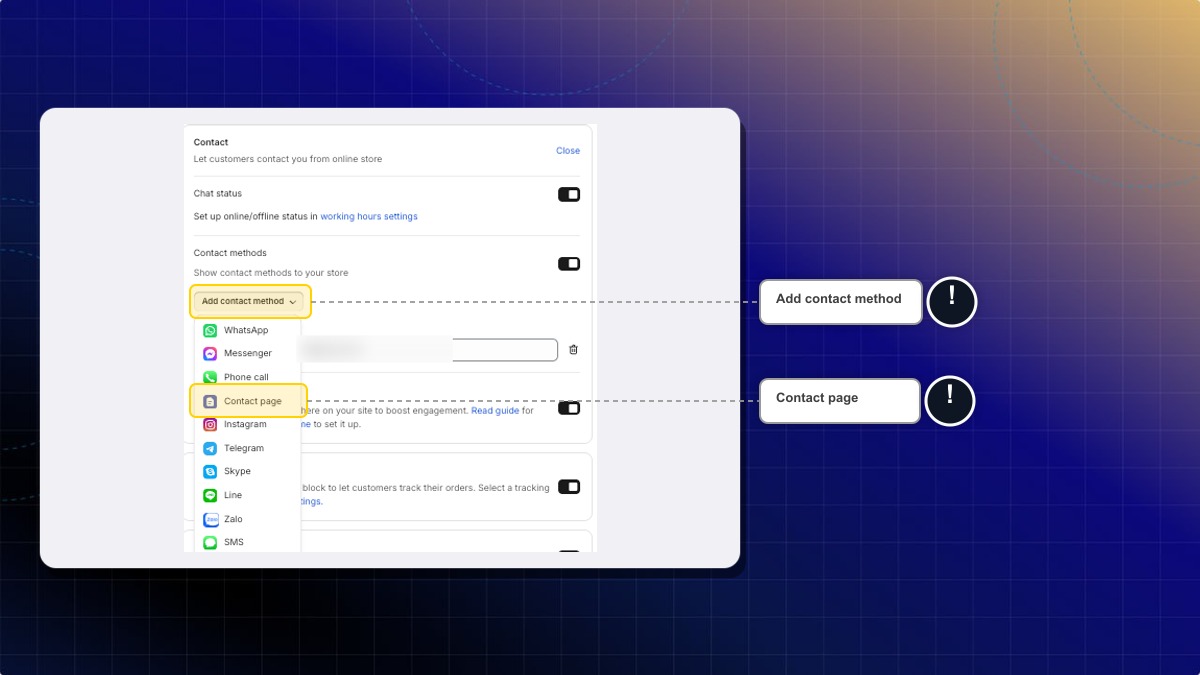
Expected result: Your contact page appears as an icon in the chatbox's contact row, next to your other methods. A customer who taps it opens that page directly.
How many contact methods are supported in Chaty?
Now, Chatty supports 12 contact methods:
- Messenger
- Phone
- Telegram
- Skype
- Line
- Zalo
- Tiktok
- SMS
- Contact page
More methods are coming soon.
Appearance settings
Set brand colors
You can select colors from our preset or customize your own.
Or simply click Surprise me for inspiration.
Set chatbox button
- Select launcher: Icon only, Label only, or Icon & label
- Select or upload your own icon, and set a label of up to 20 characters
- Select button size: Small, Medium or Large
- Set position: pick the corner, then nudge the horizontal and vertical margin
Set chatbox style
- Select: No navigation or Show navigation
- Set ratio of chatbox on mobile
Shared chatbox settings
These settings sit in the Shared chatbox settings card on the Chatbox page. They apply to both Legacy chatbox and AI Mode. Most rows open when you click them. Embedded chatbox has its button on the row itself, and Continue as email has its switch there. Click Save after a change.
Use deep links
Learn how to use deep links.
Select which devices and pages you want to show chatbox on
- Devices: All devices, Desktop only or Mobile only
- Pages: Show on all pages, Show on specific pages or Hide on specific pages
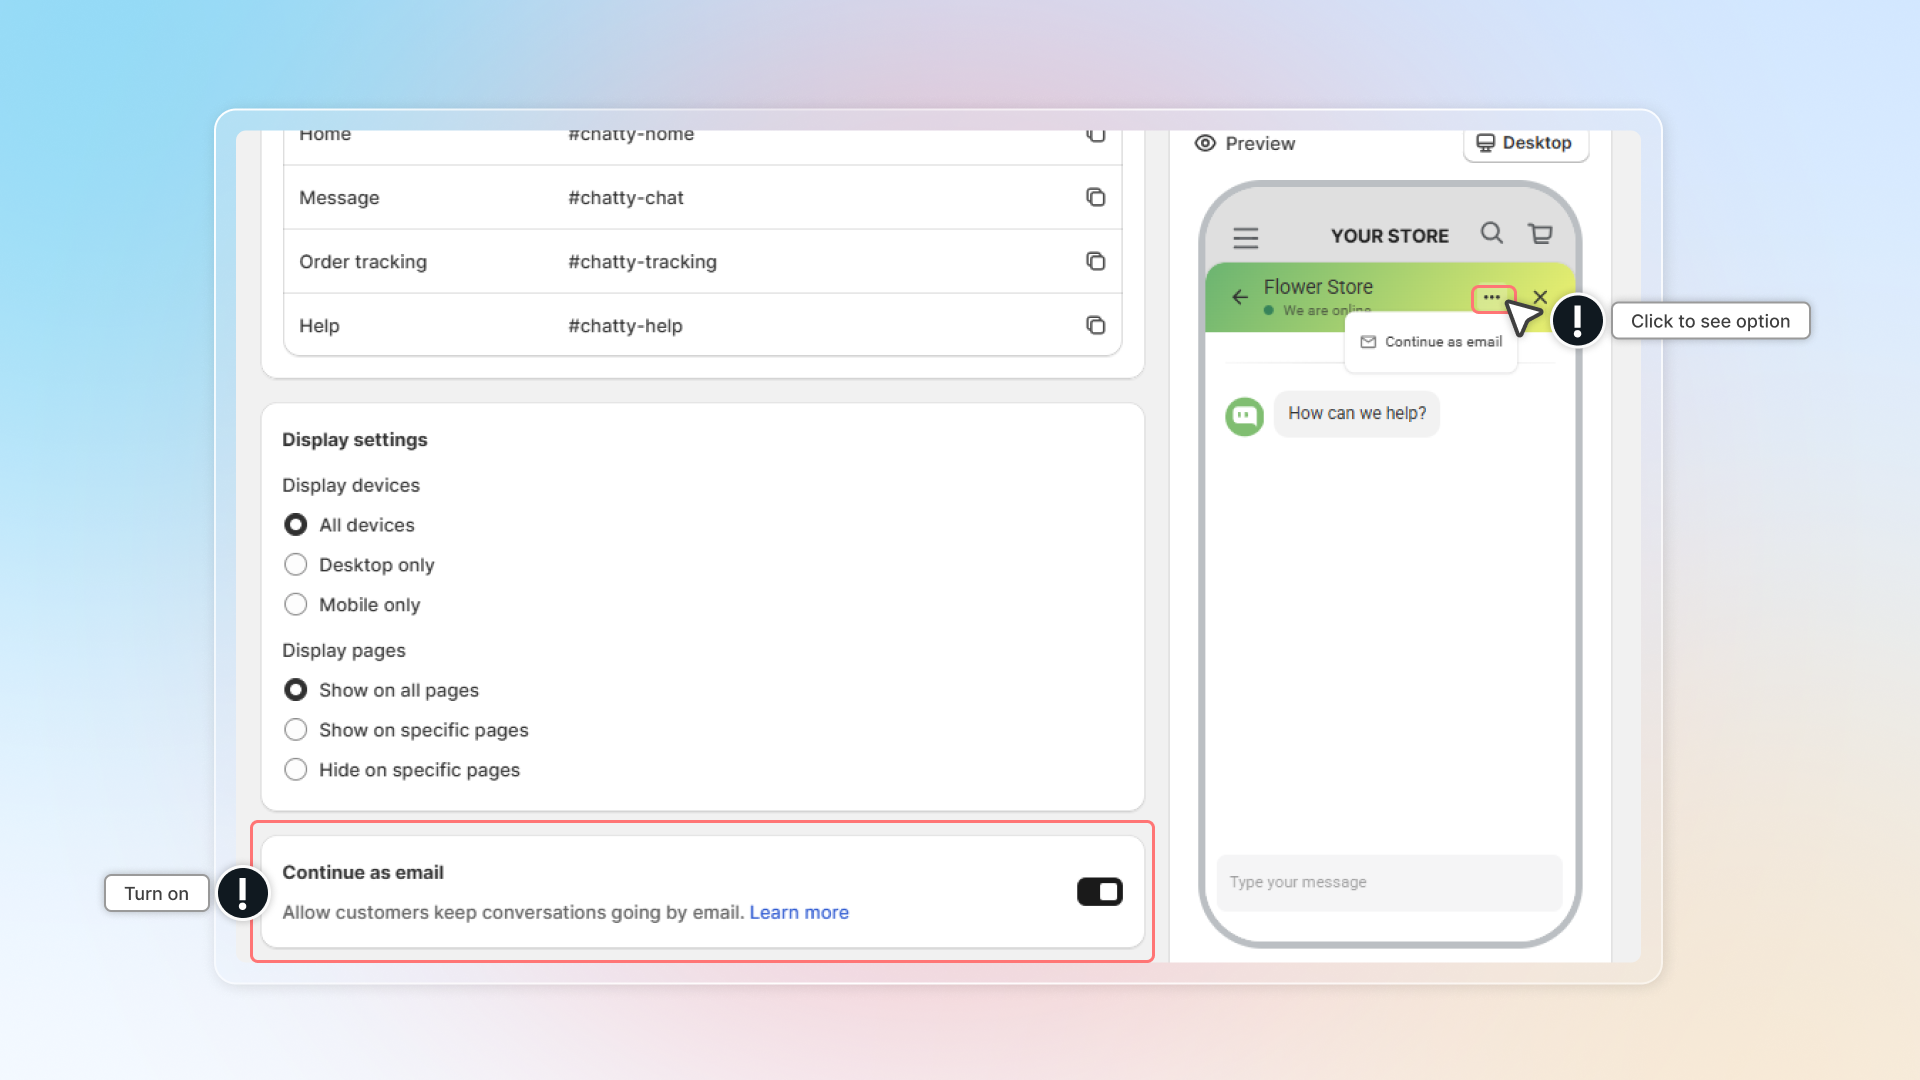
Continue as email
This helps customers keep their conversation going by email instead of live chat.
Turn on Continue as email in Shared chatbox settings. In chatbox, customers can select Continue as email to keep the conversation going by their email.
Add custom code
Custom CSS in Shared chatbox settings helps you to have a custom FAQs page. This required knowledge of coding. If you need any help, contact us through live chat in the app
Chat settings
The Chat page tab is gone. Welcome message and Conversation starter are cards in Legacy chatbox → General. Chat avatar and Pre-chat form are rows in Shared chatbox settings. How customers start a chat is a choice inside the Pre-chat form row.
Welcome message
The welcome message is set in Settings → General → Chat availability, next to your working hours and holidays. This card only shows an Edit welcome message link that opens that page. Learn how to set up welcome messages.
Conversation starter
List of questions shown in chat as suggestions for visitors.
Chat avatar
Set up which avatar will be shown in the chat: Store branding or Team member. Find it in Shared chatbox settings → Chat avatar.
Set how customers start a chat
- Chat as guest: Need to submit a form to start chatting
- Chat as anonymous: Stay anonymous and don't need to submit a form
- Show both options
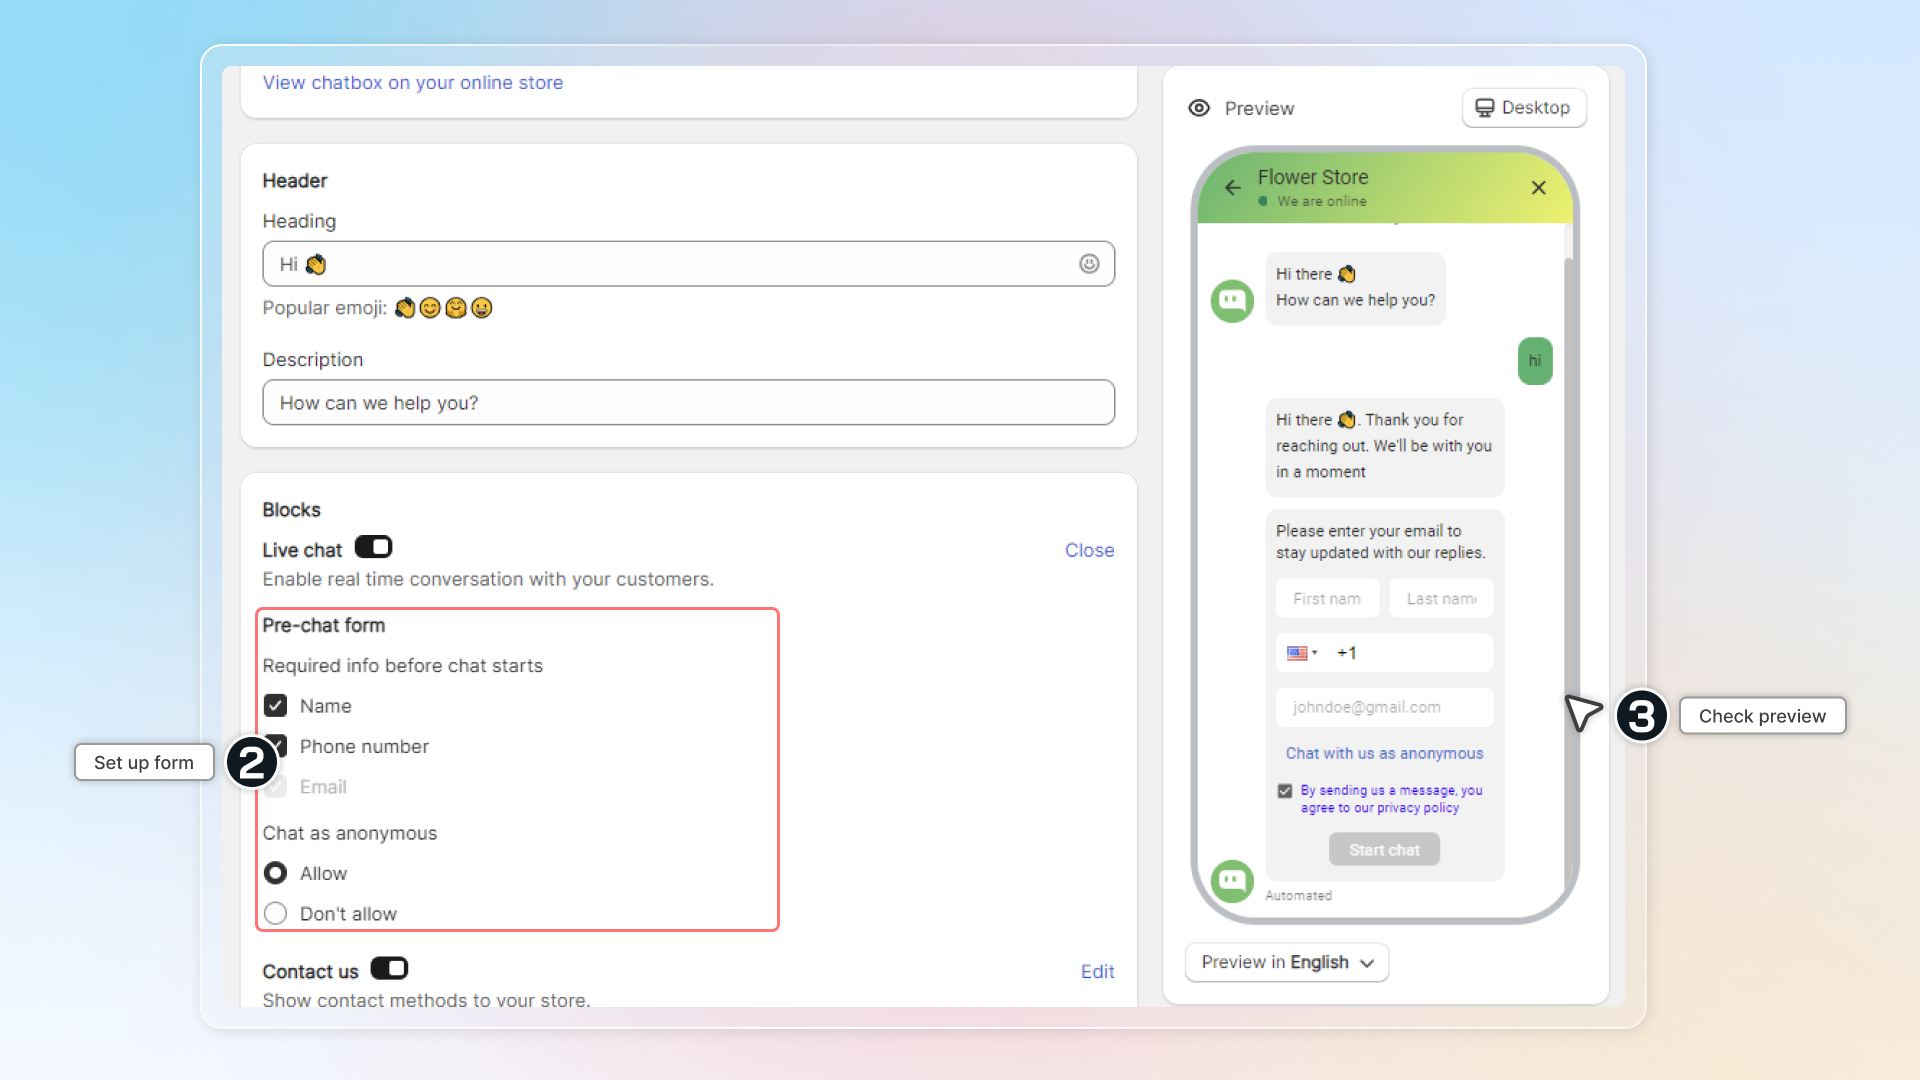
Pre-chat form
It helps you collect customer information if you set "chat as guest" as a way to start a chat.
You can collect: email, name and phone number. Click Add contact field to add one. Each field, email included, can be set to Required or Optional, and you can remove any of them.
Unread message counter
The message counter is a small red number that appears on your chat widget icon.
It shows your visitors how many unread messages or welcome messages are waiting for your response.
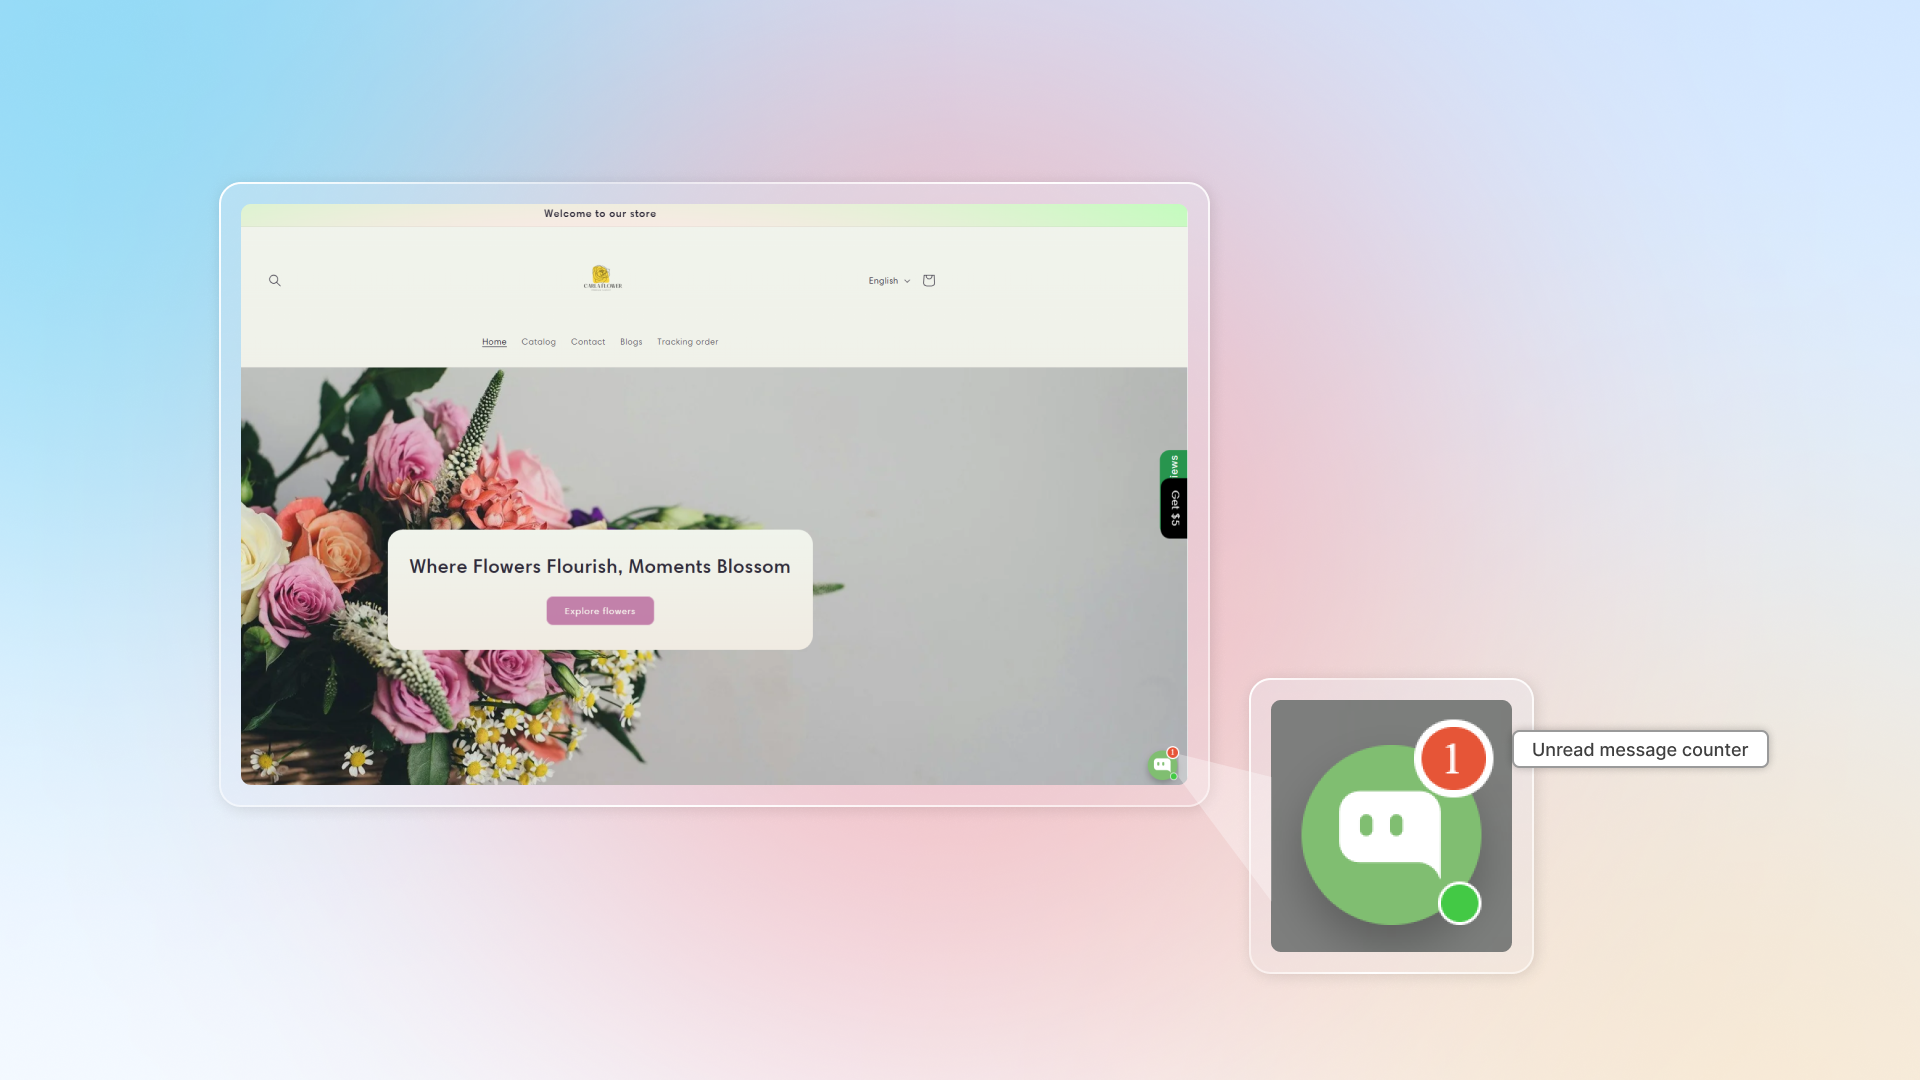
If you turning on Welcome teaser in Automation, it will count welcome messages as unread messages.
 Chatty Help Center