Set up Chatty in 15 minutes
Who can use this feature?
- The setup flow runs on every plan, including Free.
- The steps below are for the person who installed the app. Team members you invite later skip the setup flow.
This is the path from a fresh install to a working chatbox on your storefront. Four things have to happen, in this order: finish the setup flow, embed the app in your theme, turn the chatbox on, then check it on a live page.
Finish the setup flow
The first time you open Chatty, the app shows a setup flow instead of the dashboard. You cannot skip past it into the app — the dashboard only appears once the flow is finished, so do this first.
Go through the setup screens
Chatty is testing two versions of this flow. Most stores get the survey-first version. The AI-agent-first version goes to about one in four new installs. The screens you see depend on which one your store gets:
| Version | Screens, in order |
|---|---|
| Survey first | Which of these best describes you? asks how you want to handle support. Pick AI-powered, Human only or Hybrid, then click Get started. Next is Your brand, your tone: brand color, welcome message, and the language your customers mainly speak. With AI-powered or Hybrid you also name the AI, then see How AI transfer to your team and Try these use cases. With Human only you see What chatbox can help customers instead. |
| AI agent first | Your AI sales agent, then Meet your AI, where you set the agent's name, tone and greeting. Then Choose your widget UI, where you pick AI mode or Legacy chatbox. |
In the survey-first version, click Next to move on. On the last screen before the plan, the button reads Finish. Some screens also have Skip, which jumps straight to the plan screen.
Choose a plan
The last screen is Choose the best fit for you. Pick a plan or stay on Free. After this, the dashboard opens.
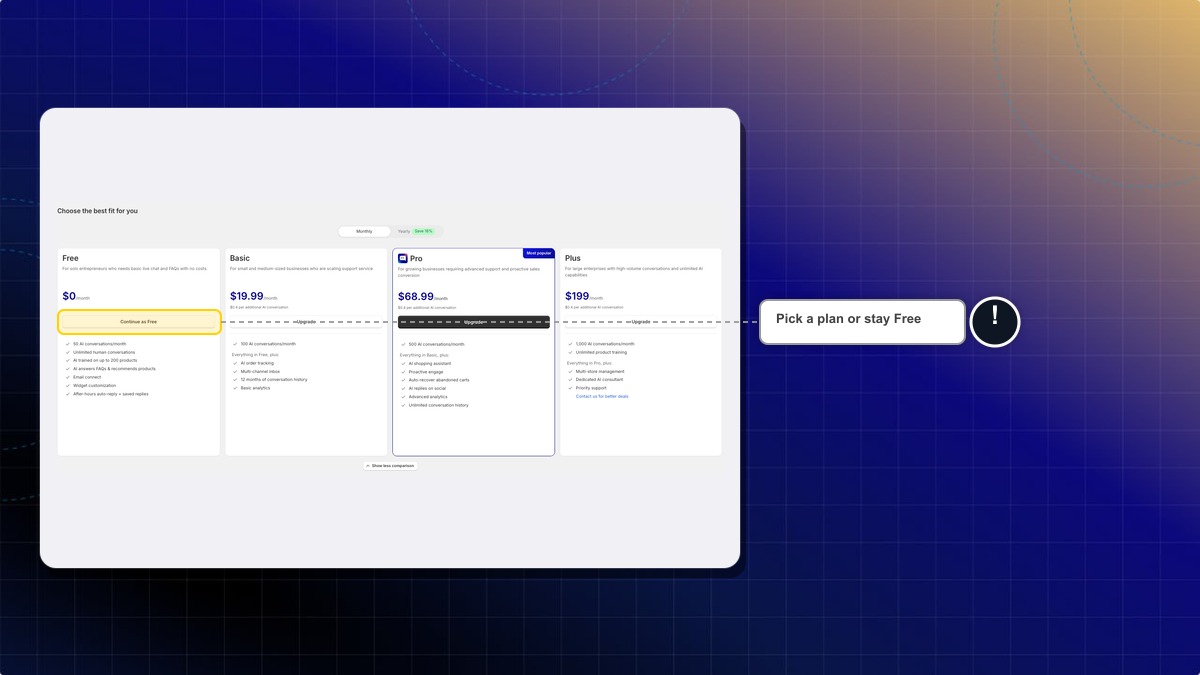
You can change the AI name, the welcome message and the colours later. The AI name is in AI agent → Settings. The welcome message is in Settings → General → Chat availability. The colours are on Chatbox: open Legacy chatbox or AI Mode, then Appearance. You don't need to change the language later: the agent replies in your customer's language automatically.
Embed the app in your theme
Chatty cannot draw anything on your storefront until the app embed is switched on in your theme. Until then the chatbox is invisible to customers no matter what your settings say.
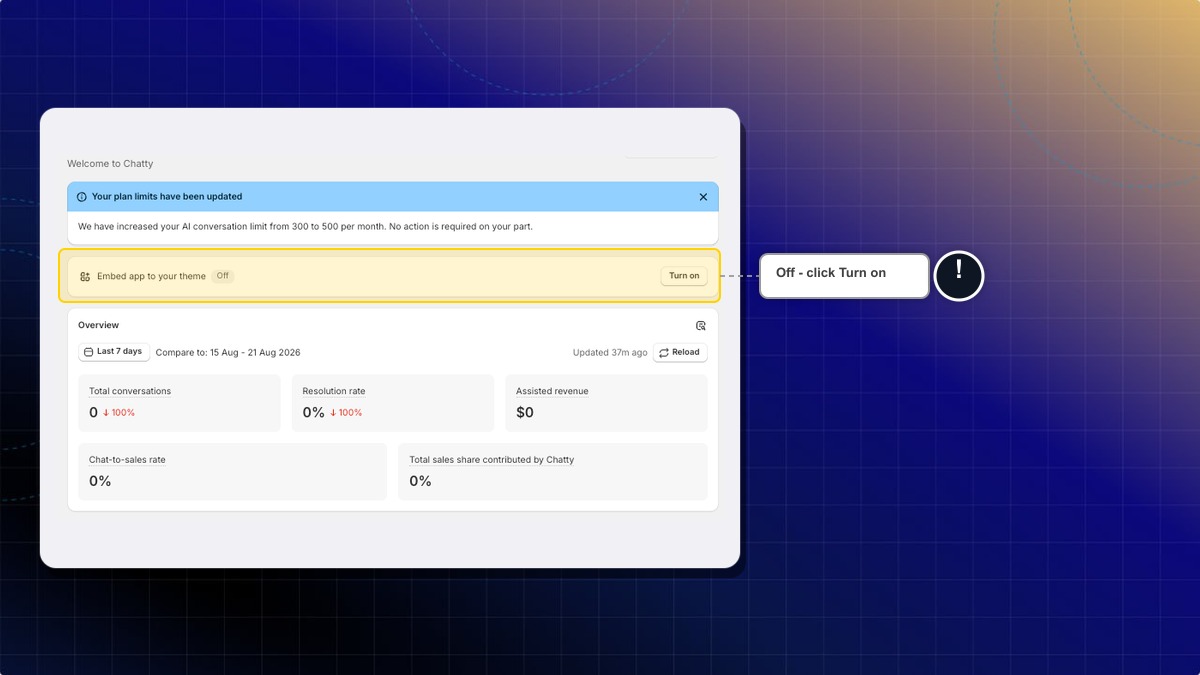
The dashboard shows a card called Embed app to your theme with an On or Off badge. The same row appears at the top of the Chatbox page while the embed is off.
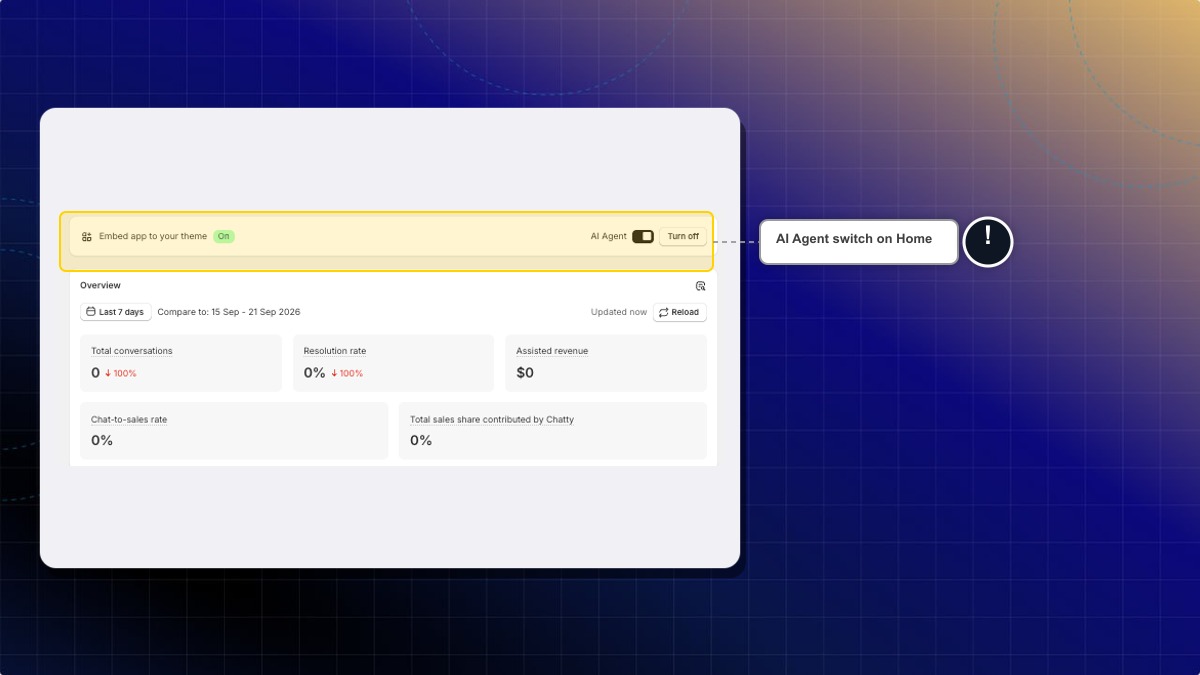
The same card has an AI Agent switch. Use it to turn the AI agent on or off without leaving Home. If your setup flow asks how you want to handle support, picking AI-powered or Hybrid turns the AI agent on right away.
Click Turn on
This opens your Shopify theme editor in a new tab, on the App embeds panel, with the Chatty entry already selected.
Switch on Chatty - Core
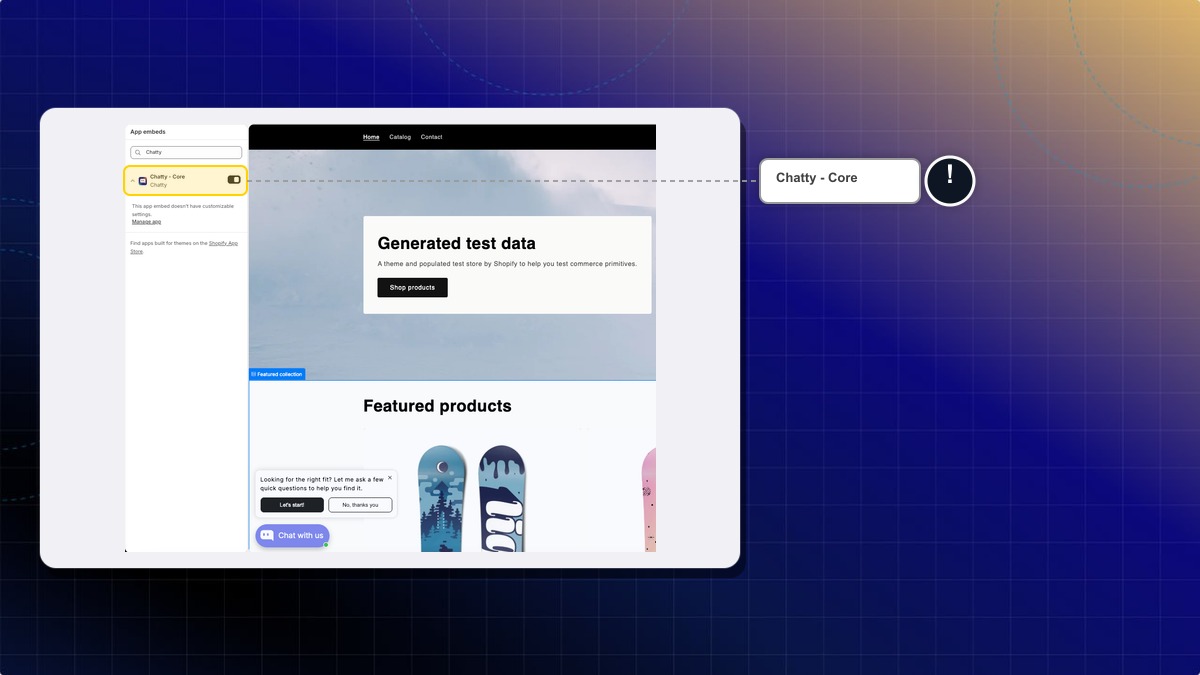
Click Save in the theme editor
The badge flips to On and the button becomes Turn off. The card stays on the dashboard so you can always see the embed's state; on the Chatbox page the row hides itself once the embed is on.
Turn the chatbox on
The embed lets Chatty run. A separate switch decides whether the chatbox actually shows.
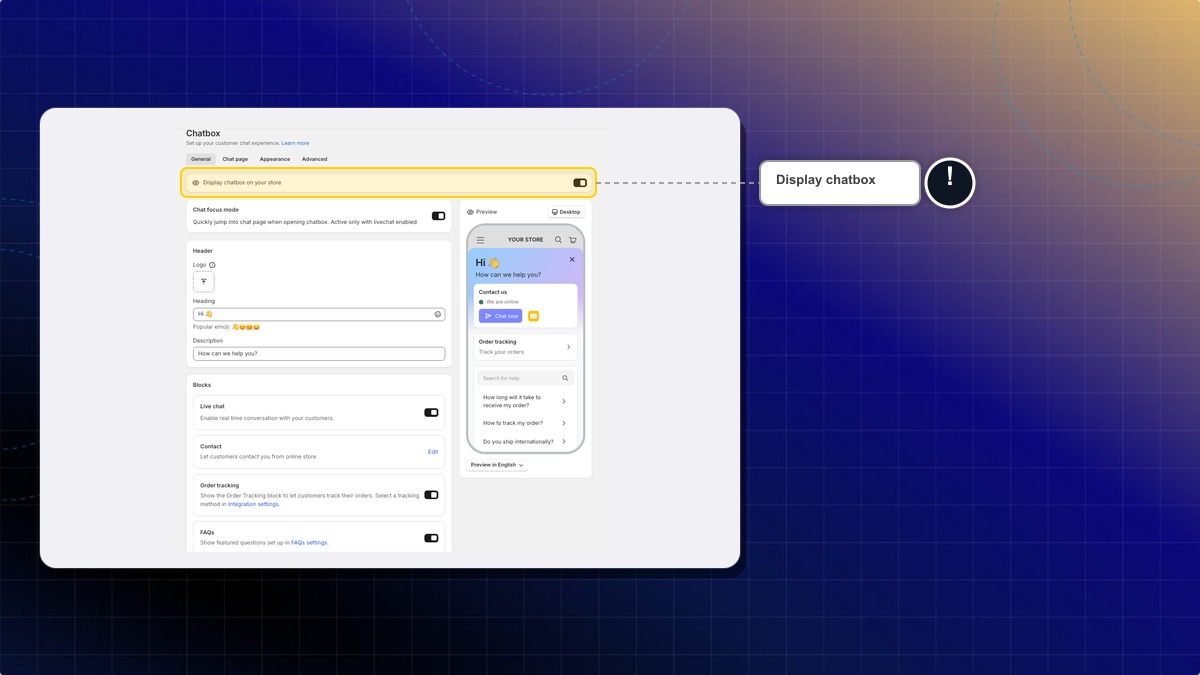
Go to Chatbox
Turn on Display chatbox on your store
It is in the first card on the page. The same card shows the app embed row while the embed is still off, so you can do both from here. The switch saves as soon as you flip it.
Check it on your store
Open your storefront in a new tab. You should see the chat launcher in the corner you chose. Click it and the chatbox opens.
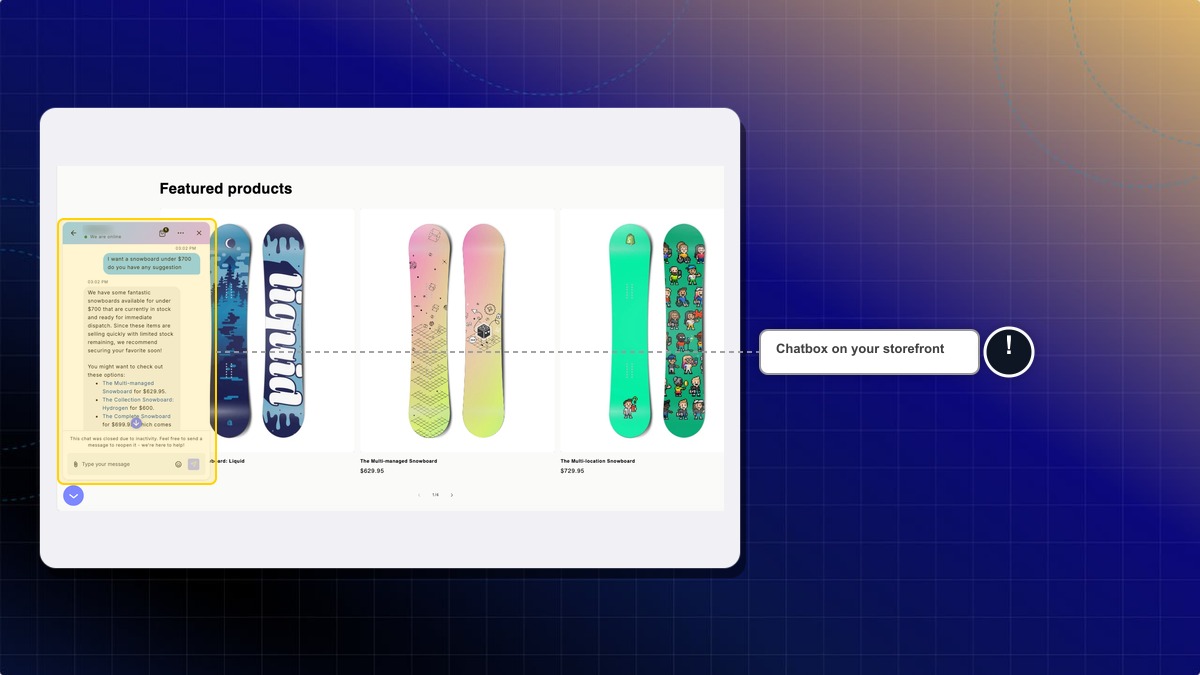
If nothing appears, work through these in order:
| Check | Where |
|---|---|
| Is the app embed on? | Dashboard, Embed app to your theme card |
| Is Display chatbox on your store on? | Chatbox |
| Are you on a page the chatbox is allowed on? | Chatbox → Shared chatbox settings → Display rules |
| Are you on a device the chatbox is allowed on? | Chatbox → Shared chatbox settings → Display rules |
Work through the Quick start guide
The dashboard carries a card called Quick start with five tasks. It tells you how many are done, and names the next unfinished one.
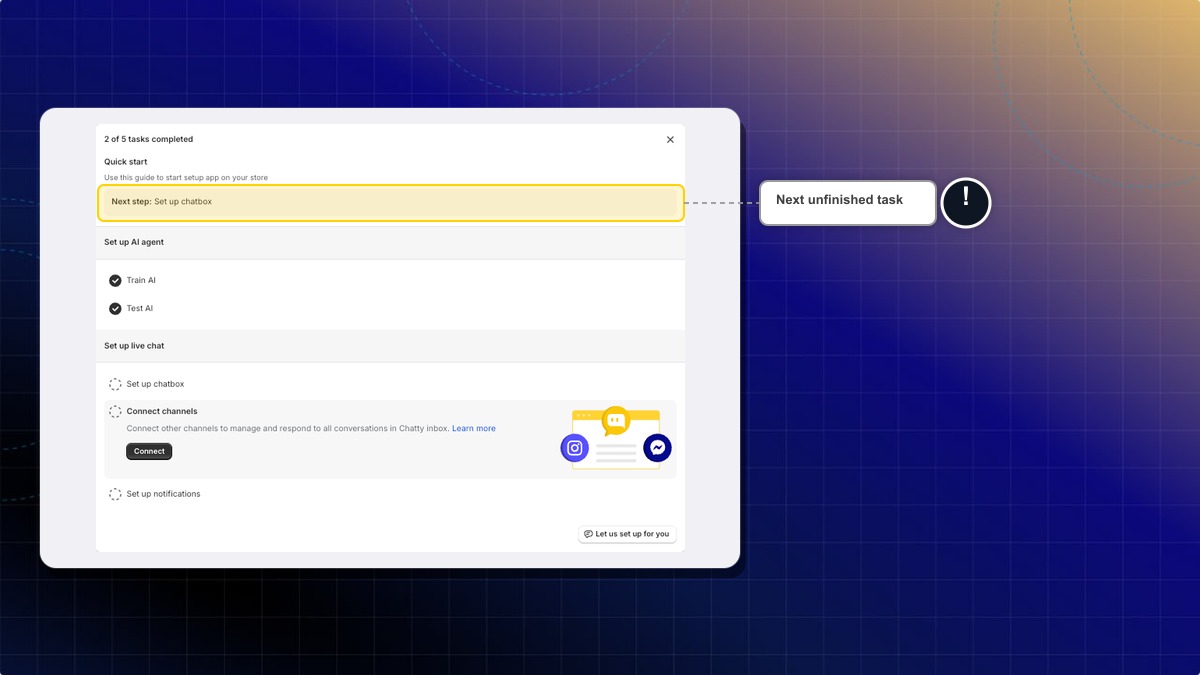
| Group | Task | What it means |
|---|---|---|
| Set up AI agent | Train AI | Give the agent your data so it can answer accurately |
| Set up AI agent | Test AI | Chat with the agent yourself and find the gaps |
| Set up live chat | Set up chatbox | Appearance, blocks and chat page |
| Set up live chat | Connect channels | Bring Messenger, Instagram, WhatsApp and email into one inbox |
| Set up live chat | Set up notifications | So new messages reach you |
Click a task to open its description, then use its button to jump to the right screen. Each task also has a circle on the left you can click to tick it off or untick it by hand, whatever the app detected.
Two more controls:
- Let us set up for you at the bottom opens a chat with the support team, listing the steps you have left.
- The X at the top hides the card. You get one chance to undo before it is gone for good.
The card collapses on its own when all five are done. It does not delete itself, so you can reopen it any time.
Read your dashboard
Once you have conversations, the dashboard shows an Overview card with five numbers over a date range you pick, each compared against the previous period:
| Number | What it counts |
|---|---|
| Total conversations | Every conversation, with an AI-handled count and share underneath |
| Resolution rate | Share of conversations resolved, with the resolved and total counts |
| Assisted revenue | Value of orders that came out of Chatty conversations |
| Chat-to-sales rate | Share of conversations that produced a sale |
| Total sales share contributed by Chatty | Chatty's share of your whole store's sales |
The search icon at the top right opens the full Analytics section.
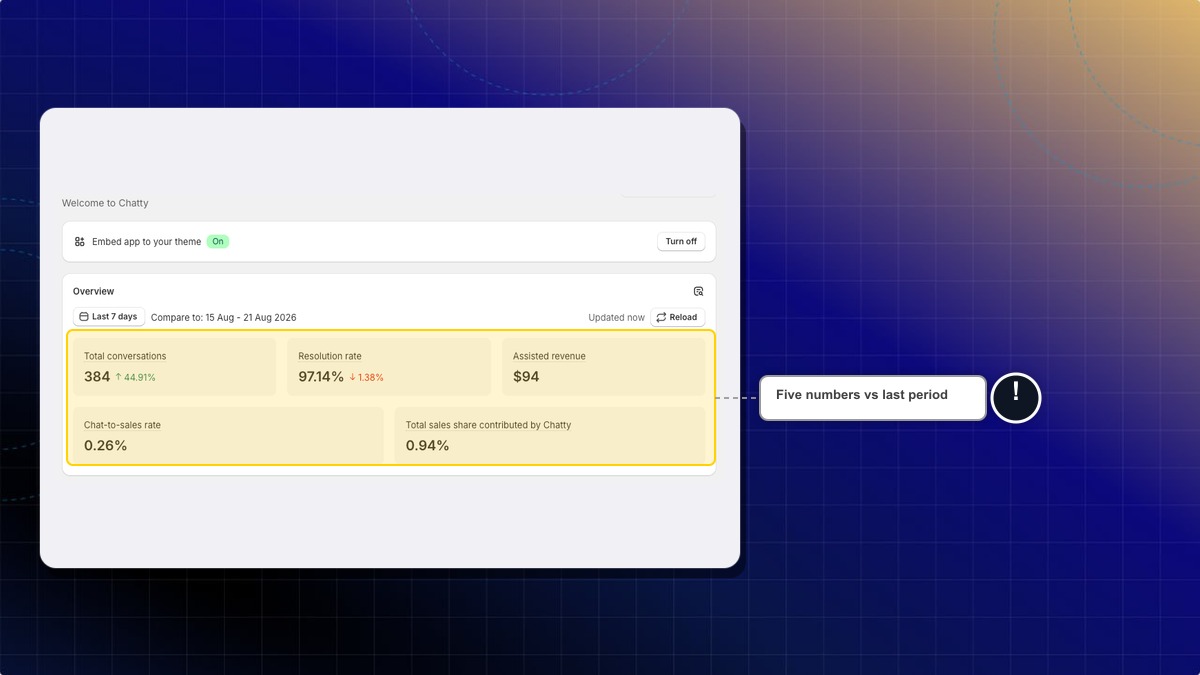
The card is hidden until your store has its first conversation, so a brand new store will not see it.
The rest of the dashboard
| Card or button | What it does |
|---|---|
| What's new (top right) | Release announcements. The button marks them read as you go |
| Plan banners | Notices about your plan — limit changes, trial offers, a confirmation after you switch plans. Each one links to where you act on it |
| New in Chatty | Recently shipped features, two at a time, with a preview and a link into the feature |
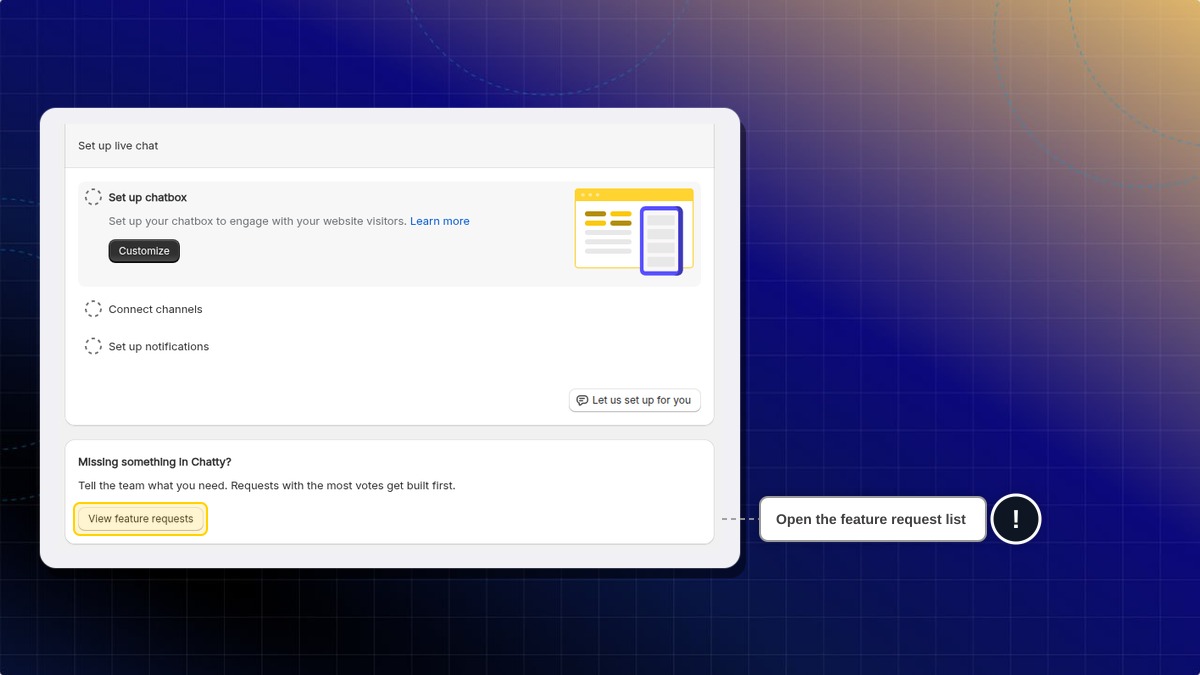
| Missing something in Chatty? | Opens the feature request list |
Ask for a feature
Feature requests is a public list of what other stores have asked for and what the team is building.
Open the list
From the dashboard, click View feature requests on the Missing something in Chatty? card.
Filter it
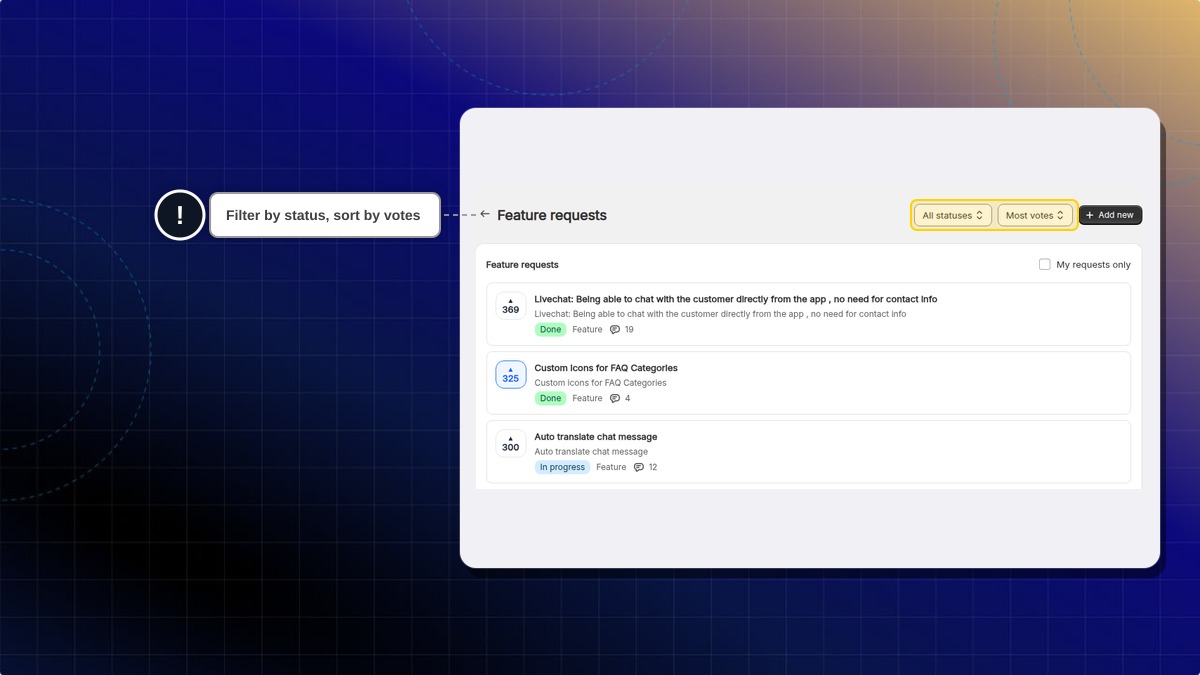
Two dropdowns in the page header: status (All statuses, Considering, In progress, Done) and sort (Most votes or Recent). You pick one status at a time. The list opens on All statuses and Most votes, so finished requests show too. The My requests only checkbox narrows the list to what you submitted.
Vote on what you want
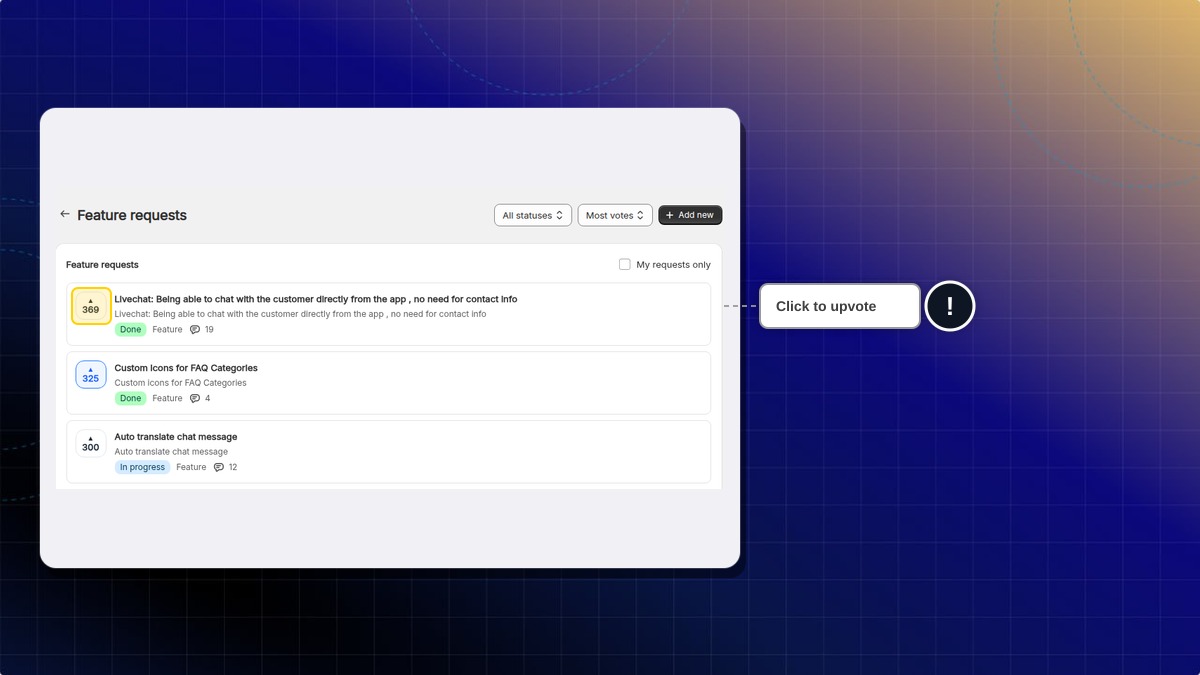
The arrow button on the left of each row is an upvote. Click it again to take your vote back.
Open a request to comment
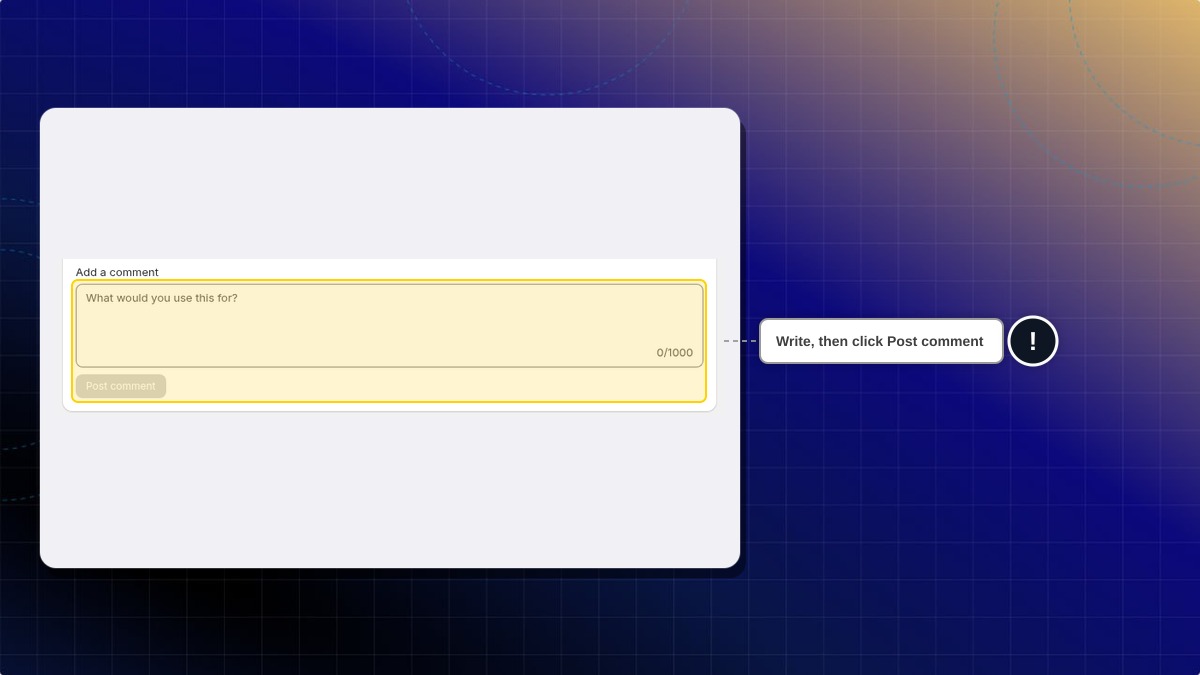
Click the title or description of a request to open it. Type in Add a comment, for example what you would use it for, then click Post comment. A comment can be up to 1000 characters.
Add your own
Add new in the page header opens the Request a feature form:
- What should Chatty be able to do? Required, up to 120 characters. Example: "Save canned replies".
- Tell us more: optional, up to 1000 characters. Example: "My team types the same shipping answer many times a day."
- Type: New feature, Improvement or Bug report.
Click Submit request to send it.
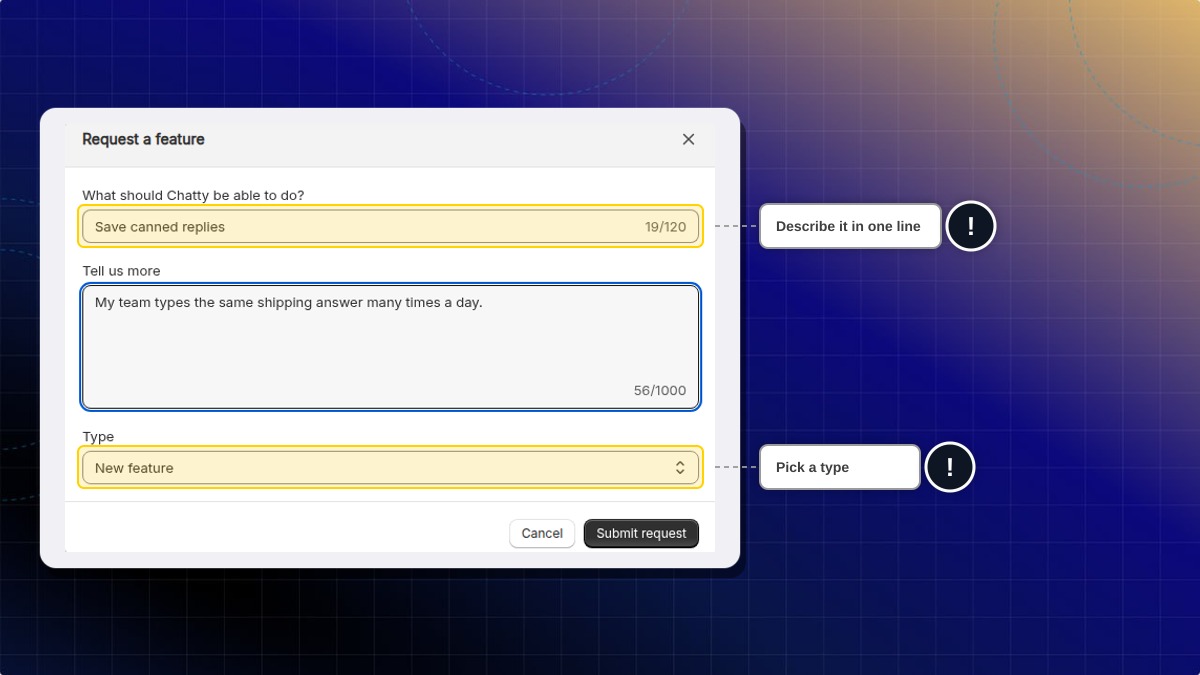
A new request does not appear in the list straight away, even with My requests only ticked. It goes to the team for review first, and shows up once it has been accepted. There is also a cap on how many requests one account can submit in a day; the app tells you if you reach it.
Why can't my staff open Feature requests?
Only the store owner can open the Feature requests page. Staff accounts do not have access to it.
Your account
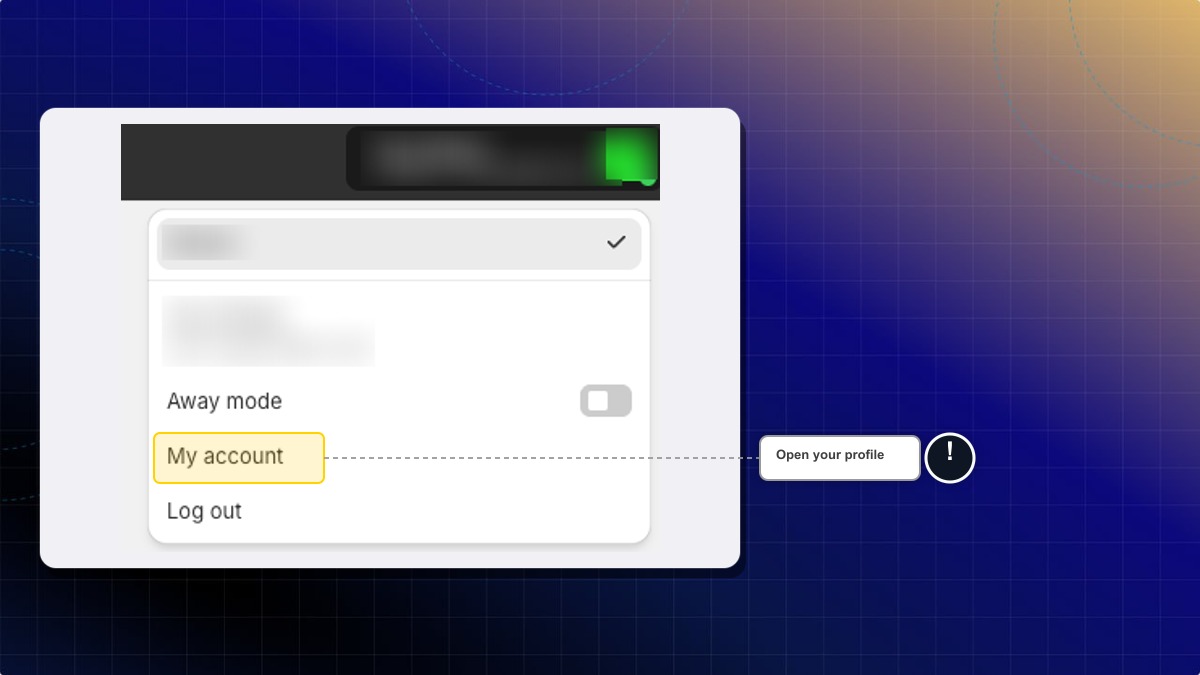
Your own profile is separate from your store settings. In the web app, click your avatar at the top right and choose My account.
| Section | What you can do |
|---|---|
| Details | Upload or remove your avatar, set first and last name (30 characters each), and see the email your account uses. The email is read-only |
| Password | Change your password |
| Login service | Shows whether your account is connected to Google, and to which email |
| Manage devices | Every device signed in to your account |
The avatar has to be a .jpg or .png under 1 MB.
Manage devices lists each session with its device type, browser, operating system, city, country, IP address and when it was last active. Your current device is badged. Log out on a row ends that one session; Log out all other devices, the button at the top of the section, clears everything except the device you are on. Devices you have logged out stay listed under Logged out so you can see what happened. See Manage login devices for more.
Password and Manage devices only appear in the Chatty web app. Login service shows in both. Inside Shopify admin your session belongs to Shopify, so those sections are hidden.
Where to go next
- Build your FAQs so both the chatbox and the AI agent have something to answer with
- Train your AI agent on your products and policies
- Connect your other channels to bring every conversation into one inbox
- Set up notifications so you do not miss a message
- Invite your team and give each person the right access
 Chatty Help Center