Channels
Chatty allows you to manage conversations from multiple channels in one centralized location.
You can manage all messages from email, Facebook Messenger, and Instagram right in Chatty, alongside your live chat conversations.
By connecting email, you can get emails from customers right in Chatty. The Free plan connects one email. On a paid plan, click Add email to connect more. If you move back to Free, only the first connected email keeps working.
In Inbox, conversation from email will be shown with email icon.
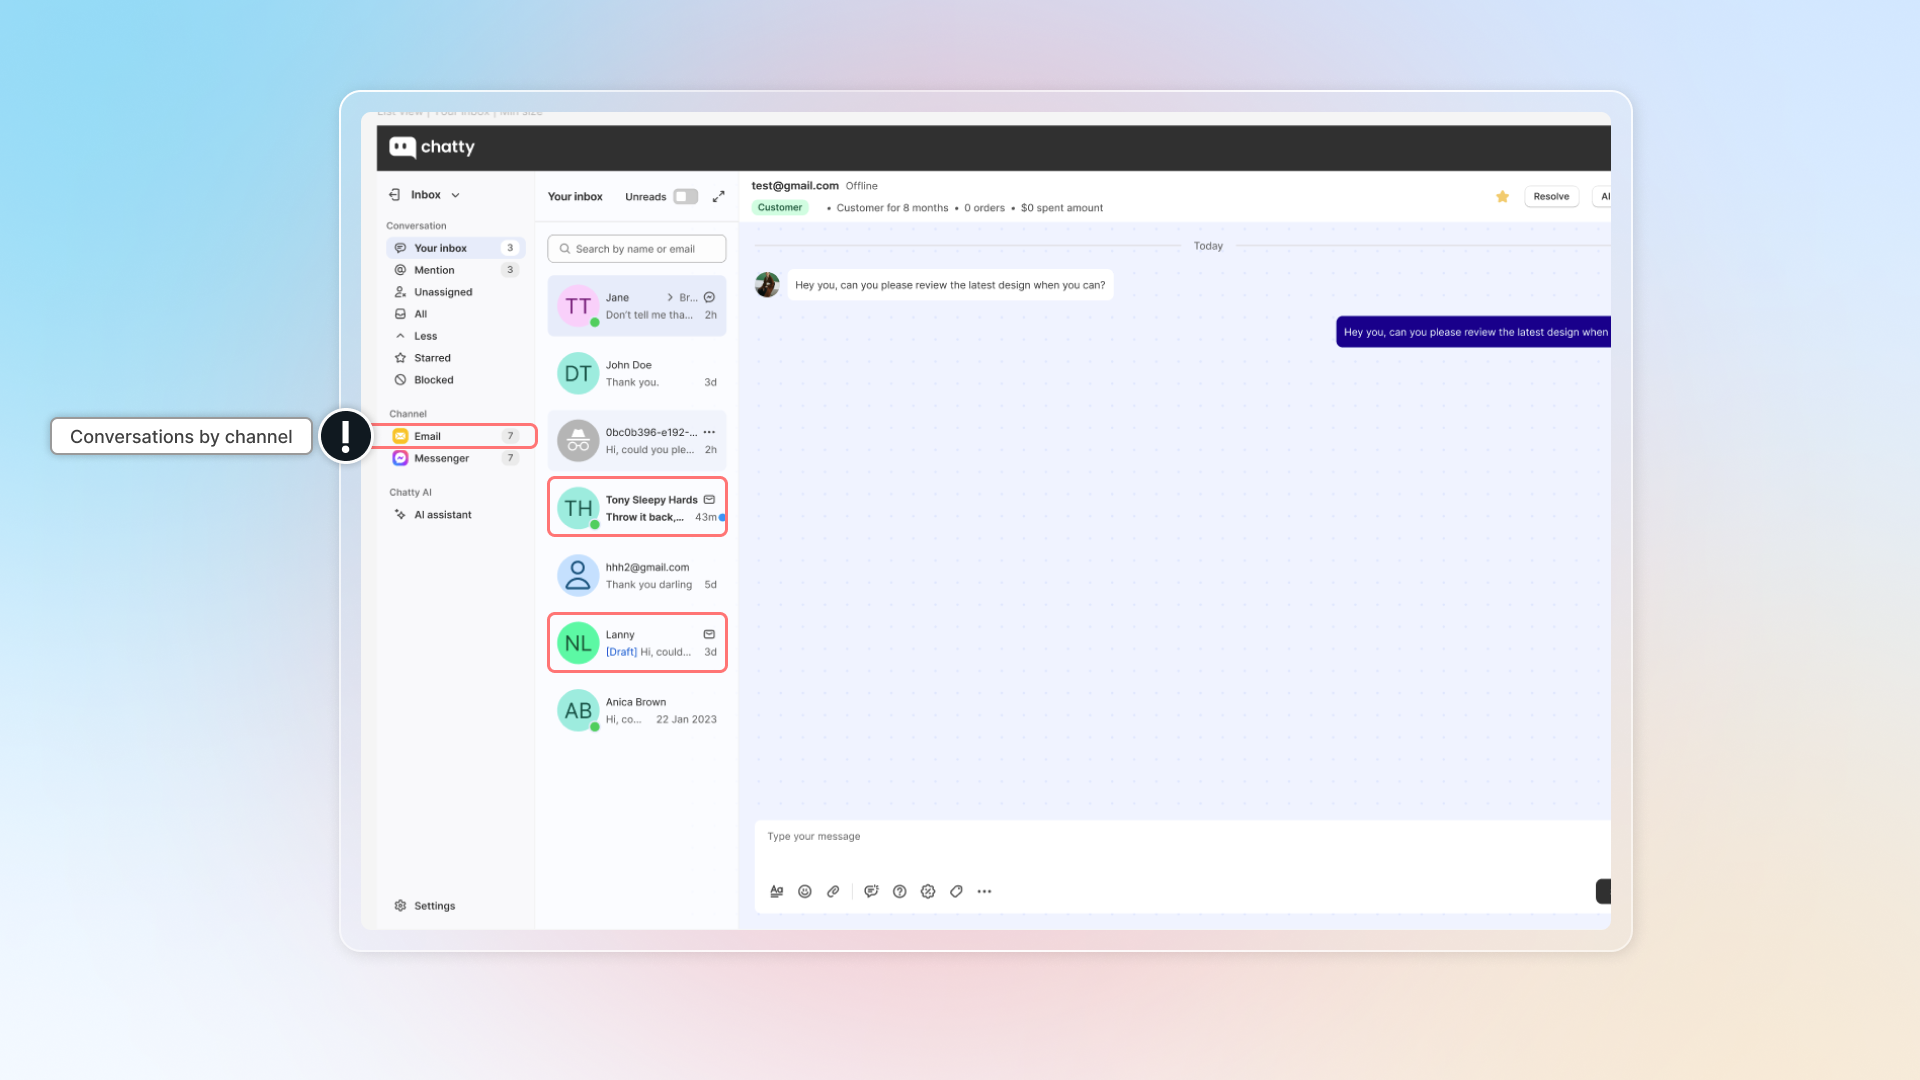
In email, you can set up:
- Email forwarding: Email you want to connect to Chatty. All inboxes from that email will be sent to Chatty Inbox.
- Email sender: You'll use this email to reply to customers' email in Chatty Inbox.
- Email signature: Email signature will be used in emails replied to customers.
Connect email forwarding
Follow our instruction to finish connecting email forwarding :
EmailUpdate email sender
In default, we use noreply@chattyemail.com to send email replies to your customer.
To update email sender:
- Go to Email sender
- Select Own email address
- Click Add and verify email
- Enter your email and click Verify
- Check email for verication link & follow link to verify
- Get back to app and click Done
- Enter name for your email
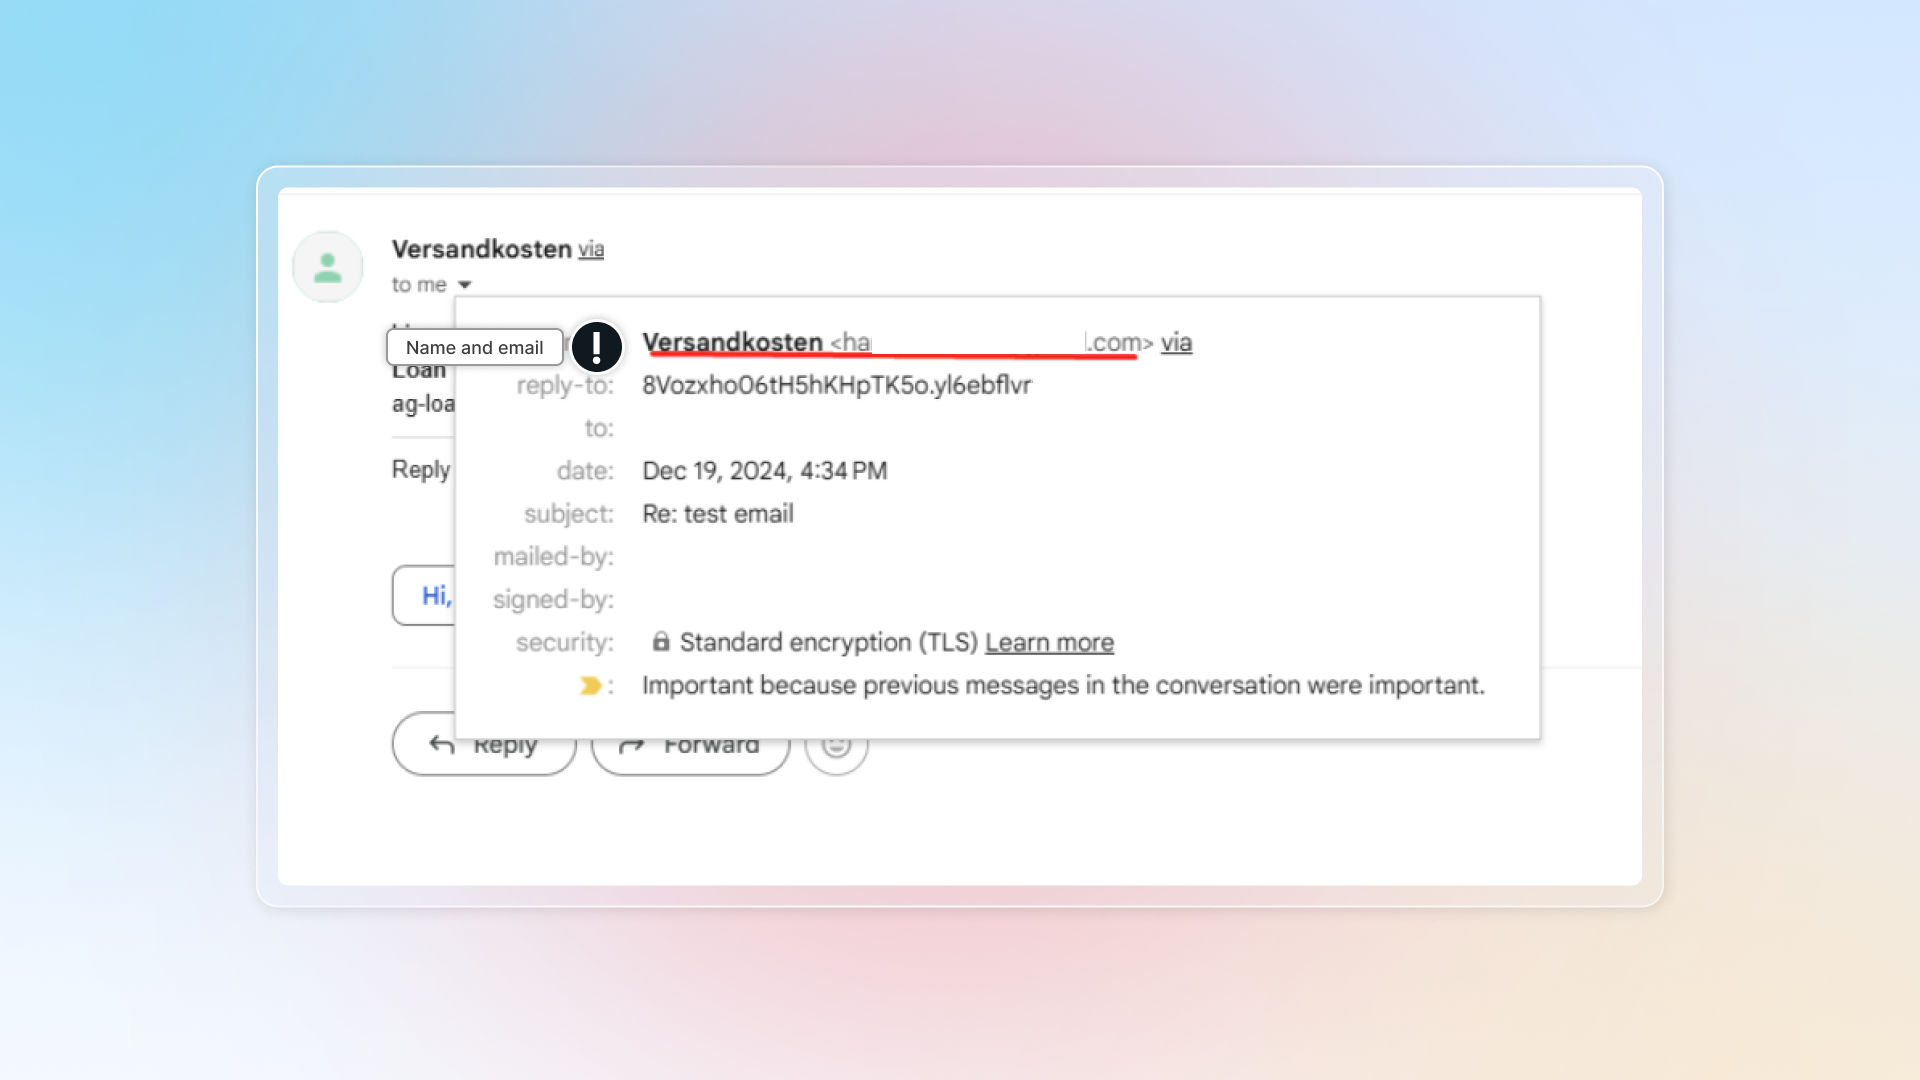
Verify your sender domain
After you verify your own email address, Chatty shows a Sender domain card with three CNAME records. Add them where you manage DNS, so inboxes can tell the mail really comes from you.
- Go to Settings → Channels → Email → Email sender.
- In Sender domain, copy the Name and Value of each of the three CNAME records.
- Add the three records in your DNS. If your provider adds your domain to the end of the name, paste only the part before it.
- Back in Chatty, click Check records now.
Expected result: The card shows Domain verified, and emails go out from your own address.
DNS can take a few hours. Chatty also checks once a day. Gmail, Outlook, Yahoo, iCloud, and Zendesk addresses always send from Chatty's address. Use an address on a domain your store owns if you want your own name on the mail.
| Status | What you see |
|---|---|
| Waiting for DNS | The records are not found yet. |
| Delivery at risk | Your domain refuses unsigned mail. Until the records are found, Chatty sends from its own address, and replies still come back to you. |
| Domain verified | Chatty signs mail from your address. Keep the three records. |
| Setup expired | Click Start verification again and add the new records. |
📸 Screenshot: Sender domain card with three CNAME records and Check records now
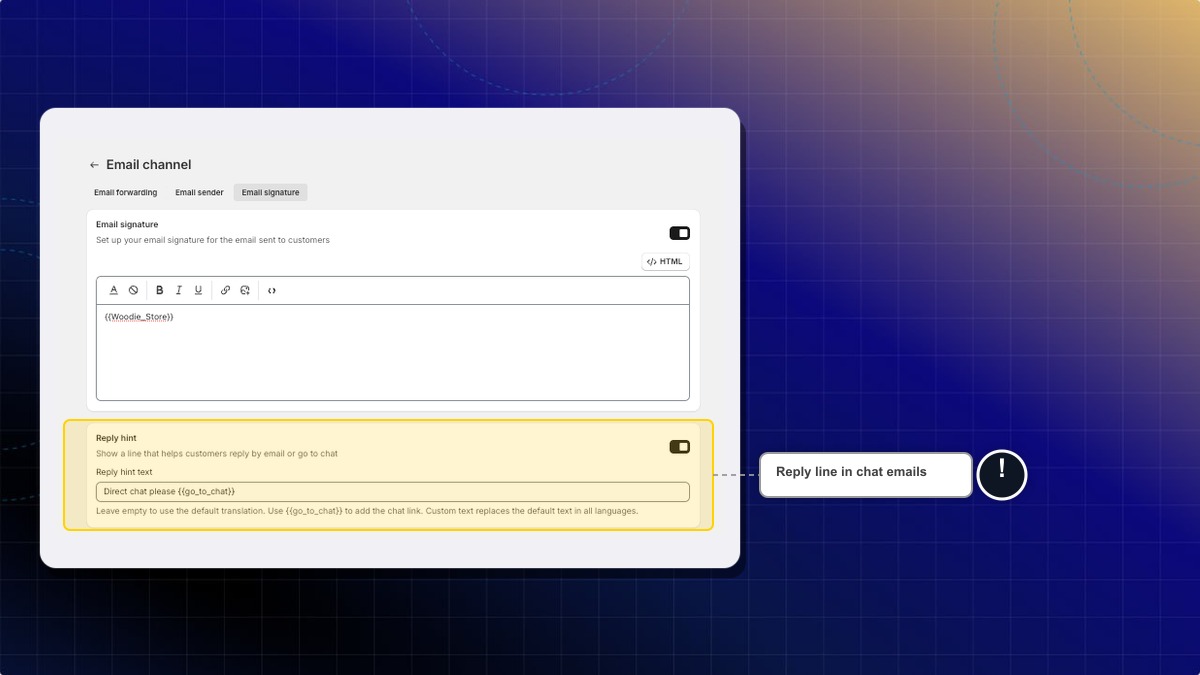
Write the reply line in chat emails
- Go to Settings → Channels → Email → Email signature.
- Leave the reply line on, turn it off, or write your own. Put
{{go_to_chat}}where the chat link should go. Leave the field empty to keep the default wording. - Click Save.
Expected result: Chat emails use your line. The reply line is on by default.
Paste an HTML signature
- Go to Settings → Channels → Email → Email signature.
- Switch to HTML.
- Paste your signature. Use a PNG or JPG logo. Chatty removes scripts and SVG images when the email is sent.
- Click Save.
Expected result: Customer emails show your signature. You can switch back to Rich text in the same place.
📸 Screenshot: Email signature switched to HTML, with a pasted signature
Edit the subscribe confirmation email
- Go to Settings → Translations, click your language, then Chatbox → Live chat → Subscribe confirmation email.
- Edit the subject, title, description, button, footer, sender line, unsubscribe link, the pages shown after subscribe and unsubscribe, or the error page. Fields you leave empty keep the default text.
- Click Save.
Expected result: The confirmation email uses your text. Edits in your default language are translated into your other auto-translated languages. The Free plan does not include auto-translate.
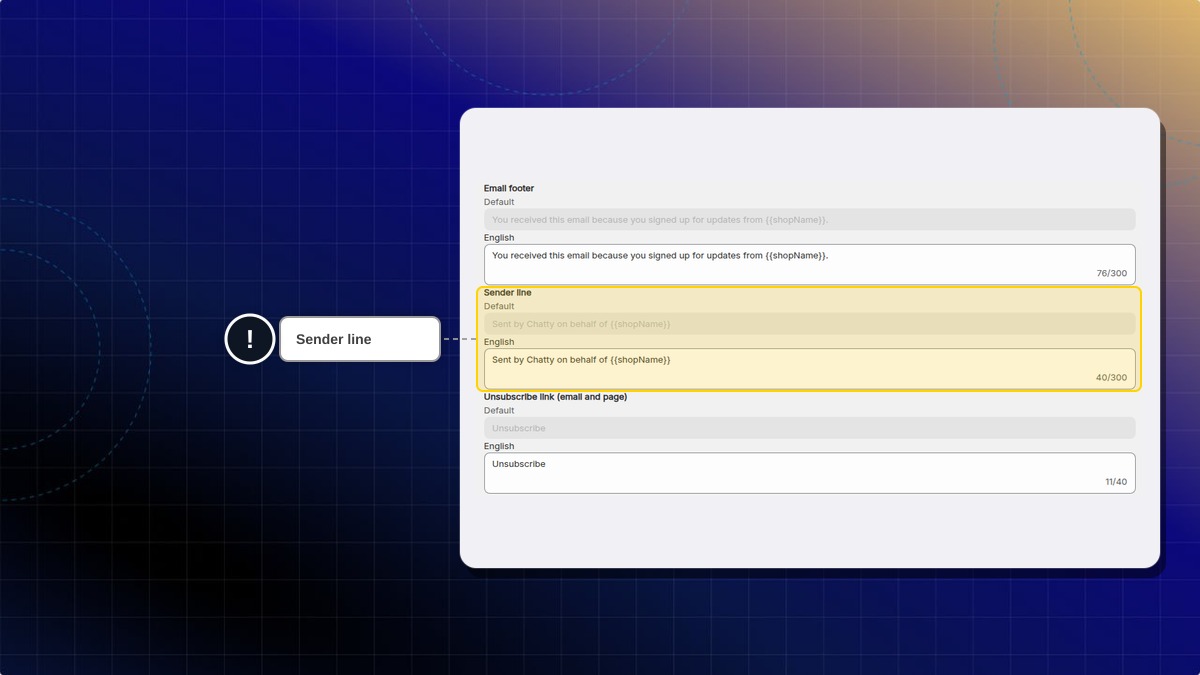
The Sender line is the small line under the footer. By default it reads Sent by Chatty on behalf of {{shopName}}. Keep {{shopName}} where your store name should go, for example Sent by the {{shopName}} team. It takes up to 300 characters.
Links and email addresses are not allowed in these fields. Chatty won't save a text that contains one.
Default CC email
Set a list of CC email addresses once and Chatty automatically adds them to every outgoing email. This keeps internal recipients in the loop without agents having to add them manually each time.
To set up default CC emails:
- Go to Settings → Channels → Email → Email sender
- Find the Cc email address section and turn it on
- Enter up to 5 email addresses, separated by commas
- Click Save
The default CC list applies to all outgoing email in Chatty, including:
- Email replies in conversations
- Offline email messages sent when no agents are available
When sending an offline email, CC addresses appear in the send modal as read-only. They are applied automatically and cannot be edited per message.
Facebook Messenger/Instagram
By connecting Facebook account to Chatty, you can receive and reply to Facebook/Instagram messages right in Chatty.
Follow our instruction to connect Facebook fanpage:
Facebook Messenger & InstagramAfter connecting your Facebook account, you can check pages you've connected here.
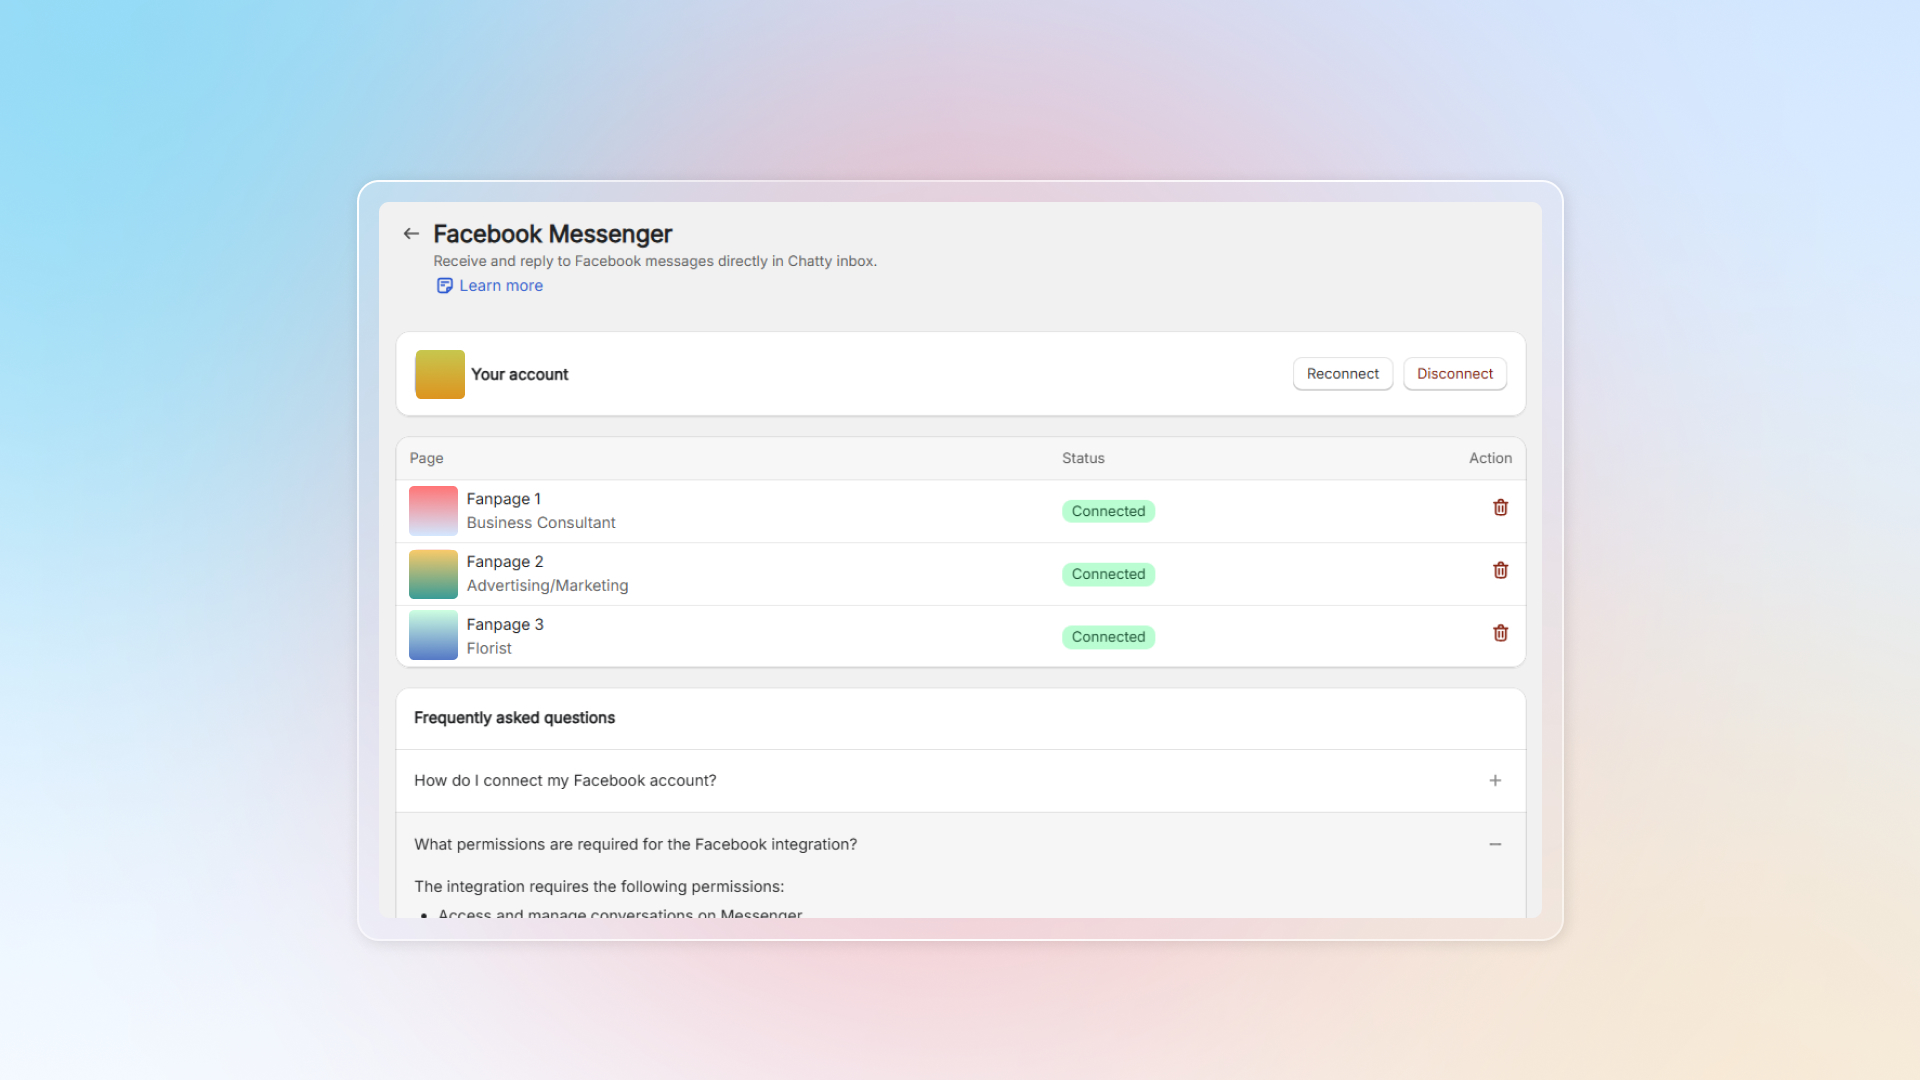
Messages from connected fanpages will be synced to Chatty inbox.
In Inbox, messages from Facebook have the Messenger icon next to it, those from Instagram have Instagram icon.
Or you can click Messenger or Instagram in "Channel" to select all conversations.
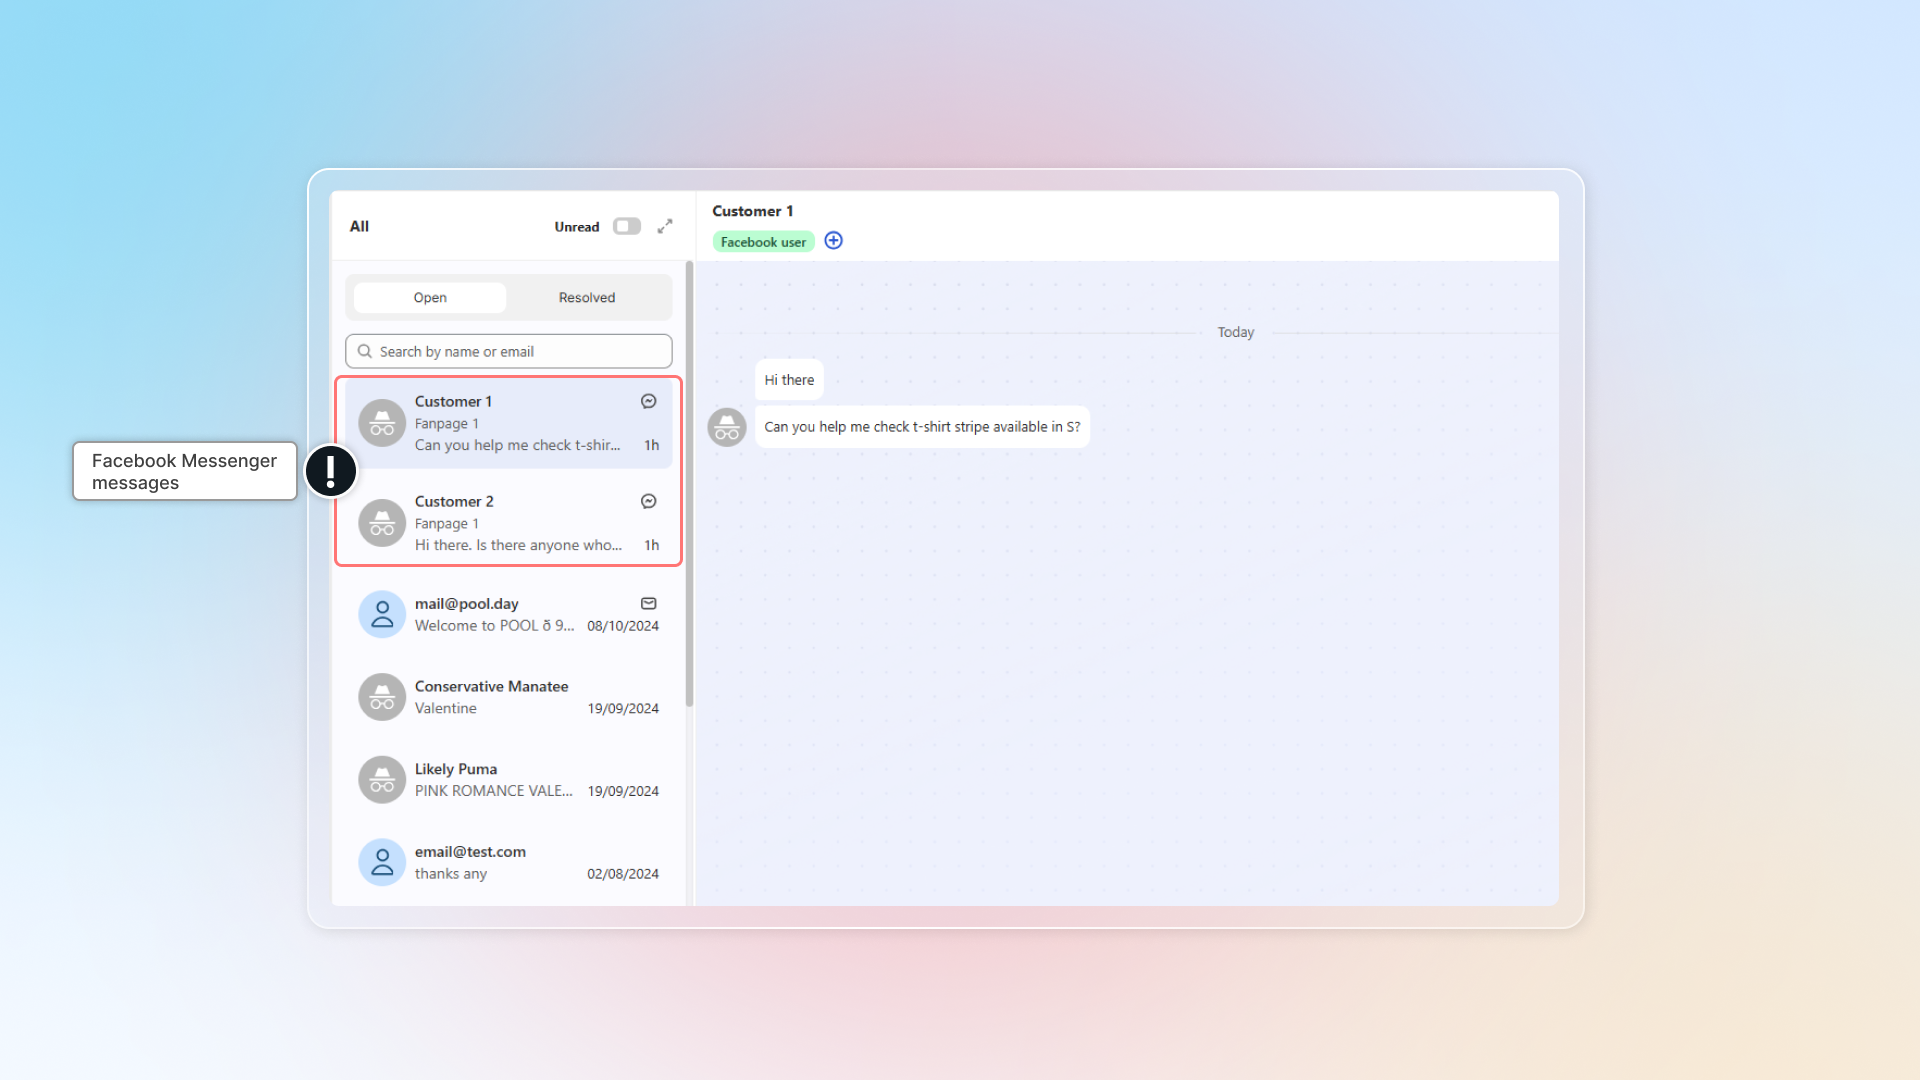
By disconnecting with Facebook fanpages, existing conversations will stay in Inbox without update.
Why does Chatty need access to my Facebook Page?
Chatty needs access to your Facebook Page to do the following:
- Show your Facebook messages in the Chatty app. This allows you to see and manage all your conversations in one place.
- Let you reply to messages directly from Chatty. This makes it more convenient to respond to people without switching apps.
- Organize your conversations and link messages to the correct Facebook Page. This helps keep your messages organized and easy to find.
By connecting WhatsApp, you can check messages from WhatsApp right in Chatty.
Before connecting WhatsApp to Chatty, make sure you have:
- A Facebook page for your business
- A WhatsApp Business account linked to that Facebook page
- Admin access to both your Facebook page and your WhatsApp Business account
You can connect multiple WhatsApp accounts to Chatty.
Follow our instruction to connect Whatsapp:
WhatsApp Chatty Help Center